Introduction
Device Discovery- Software and Computer Configuration-Basic Connectivity
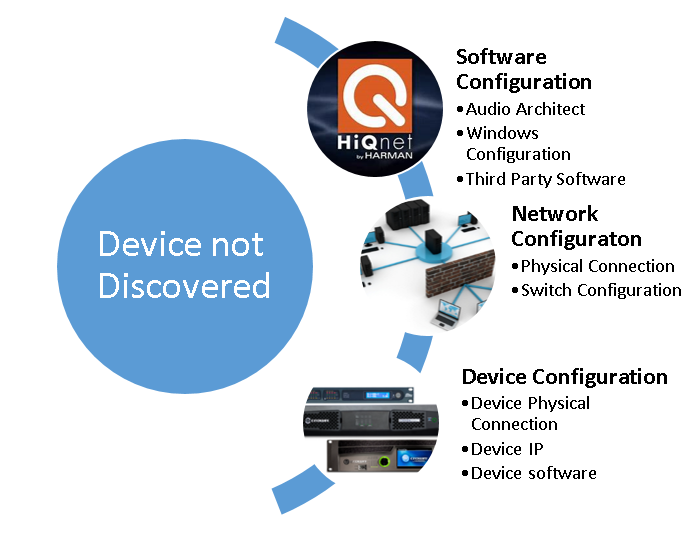
One of the biggest challenges of working with network devices is getting everything to talk over the network. In this guide we will cover the troubleshooting steps to take when you are unable to get a computer to discover a device. The process for troubleshooting device not discovered involves checking three areas Software, Network and Device Configuration. Software configuration deals mainly with the software on the PC you are using. Network configuration is the physical network including switches and cables and Device Configuration deals with the firmware and software settings of the actual HiQNet devices.snip

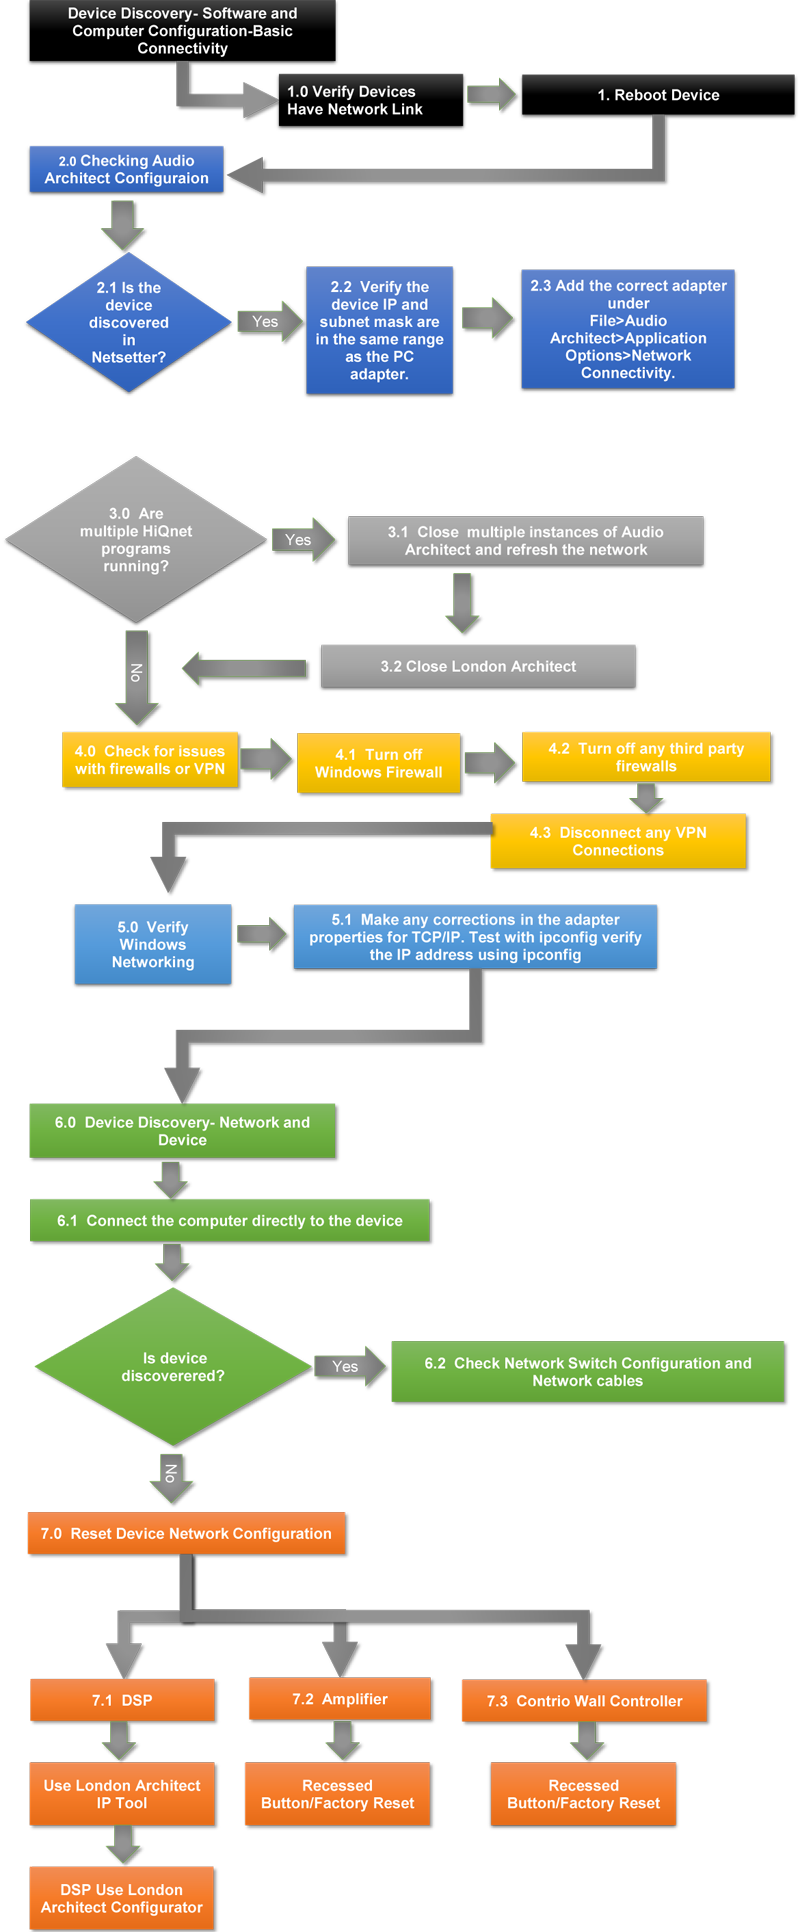
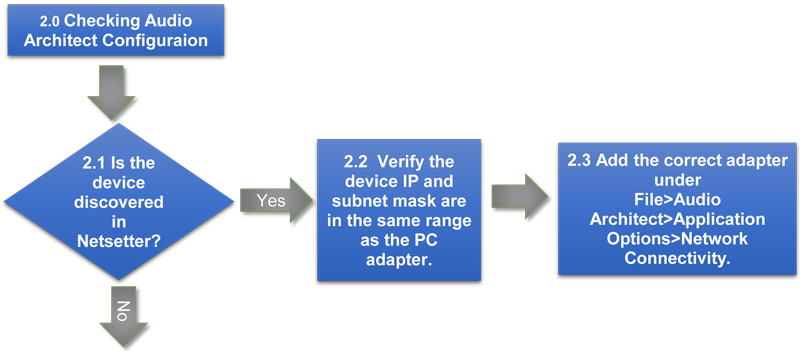
The following flow chart breaks down the process into steps starting with the computer configuration. Each section of the chart refers to section of the document that explains those steps. When you first start troubleshooting a new system it is not a bad idea to start at the beginning and systematically work through each section. As you have more experience you find that you can skip over sections based on knowledge of the system and use divide and conquer. For instance you don't necessarily need to check all of the firewall and Windows networking settings if you are missing only one device out of 20 and the other devices are seen by Audio Architect. Most likely you would want to skip to the Network and Device configuration and check the device IP to see why it is not showing up. After each section it is recommended that refresh the network in Audio Architect. This way you are changing only one thing at a time which will make it easier to determine a root case.


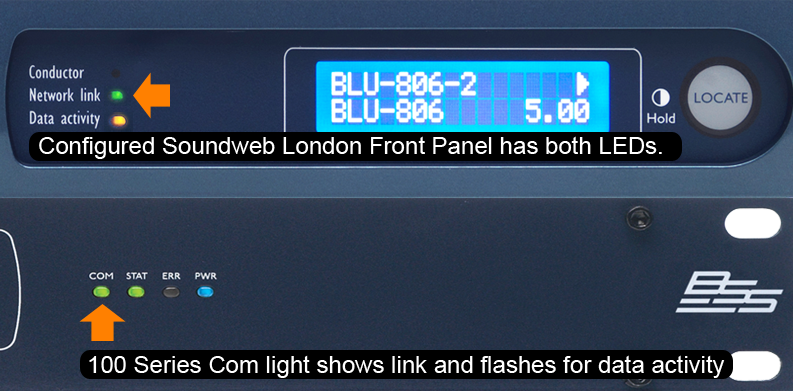
Checking the physical connection of the device verifies that the device actually has a network link light and has a solid network connection. A missing link light may indicate a cable issue or a problem with a switch port. Also it is easy to plug in the wrong port since most devices have multiple RJ45 connections, make sure the device is connected via the port labeled Ethernet.


Some devices also show their link/network status on the front Panel.

In the case of a single device not showing up it is always a good idea to power cycle the device. Also sometimes if the device is set to a static IP with a gateway that is not reachable by the computer the device will not be discovered unless it is rebooted. In this case the device will send out a broadcast announce that should be visible regardless of the IP settings .
Audio Architect and Netsetter have their own specific settings to select which network adapters are used. Netsetter is a tool that installs with Audio Architect and is used to manage the IP addresses and Network settings for HiQNet Devices.

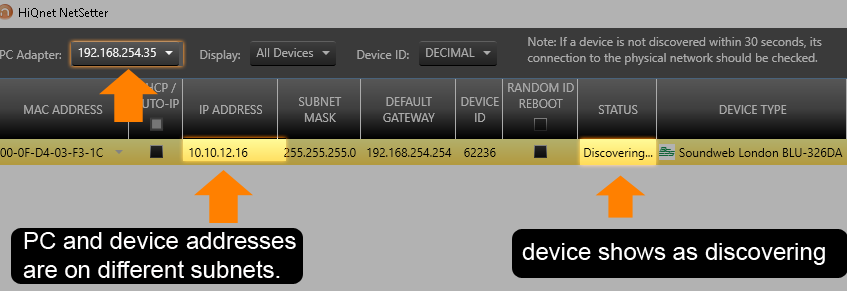
Netsetter looks for broadcast UDP packets to discover other HiQNet devices on the same network even if they are outside the IP range of the computer. Netsetter has its own selection for PC adapter which lets you quickly switch between network adapters to find a devices that may be connected to different networks. In some cases Netsetter may not see a device which might indicate the device is not connected on the same VLAN, or something in the Device/Network is preventing the discovery packets from getting to the computer.
If the device is seen by Netsetter and not Audio Architect it could be that the device IP address is outside the range of the computer's subnet. In this case the device will be seen in Netsetter but we will not be able to talk to the device unless we readdress it.

Audio Architect has its own adapter settings that are independent of Netsetter. If you see the device in Netsetter but don't see it in Audio Architect then this may be the reason. This may sound simple but many people forget to look here first. This will actually show you two things. First, it will show you what adapter the software is using. Second it will show you the IP address of the adapter. If no adapters show up when you select add (other than the loop back 127.0.0.1) then you will want to check the status of your connection in Windows. Maybe your wireless connection dropped or maybe there is another problem preventing Windows from obtaining an IP address such as the Network cable or switch port.
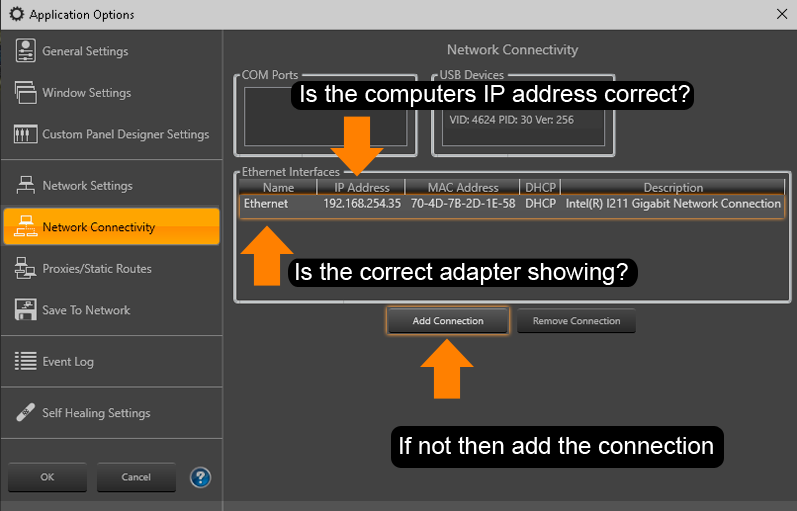
Note: We normally only recommend having one network connection here for simplicity.
Once you have the correct adapter selected, click the refresh button which is located under the Add Devices Tab. You must be in the add devices mode to see this.

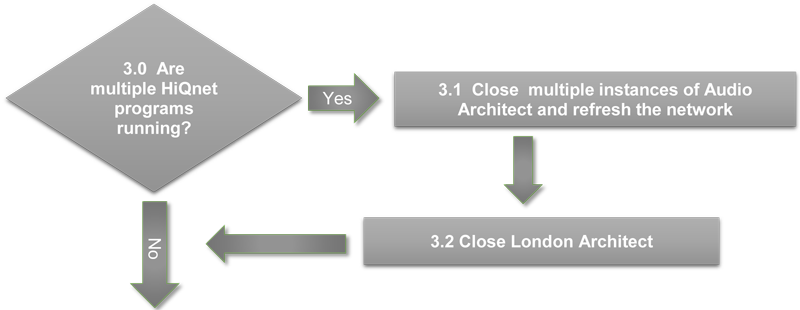

If you have more than one instance of Audio Architect running on the same computer only one instance will have an active network connection. Close multiple instances and restart the networking by selecting refresh


In some circumstances this is not obvious because the application can be minimized to the Windows hidden icons if the current user logged into Audio Architect doesn't have rights to the application.
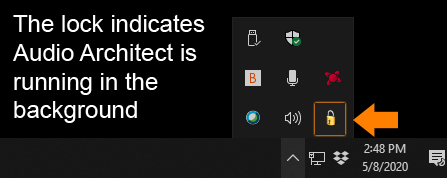

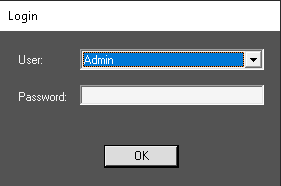
Clicking the lock icon will prompt the user to access Audio Architect and either log in Admin.

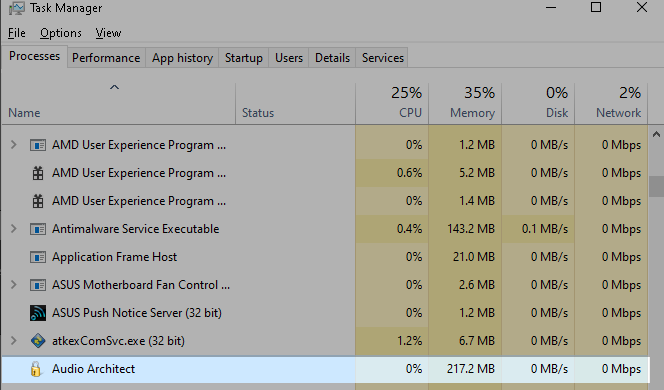
You can also check the Windows Task Manager (CTRL+SHIFT+ESC) and close the application there as well by selecting it and choosing End Task.

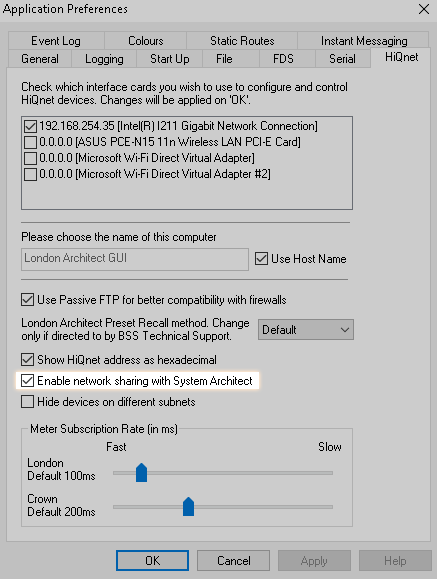
If London Architect is running at the same time it will grab the adapter in a similar manner. If you need to run both applications you will want to select Enable network sharing with System Architect in the London Architect Application Preferences. This will allow both applications to share the same network adapter.

Firewalls and VPN's are designed for network security. Party of what they do is block or encapsulate incoming and outgoing traffic to prevent hackers from accessing your data. While this is generally a good thing, if not configured correctly it can and will interfere with device discovery.


When in doubt turn off Windows firewall or allow exception for the application.
How Turn off Microsoft Defender Firewall
https://support.microsoft.com/en-us/help/4028544/Windows-10-turn-microsoft-defender-firewall-on-or-off
Audio Architect will add exceptions to the Windows Firewall for the application when you install the software.

Audio Architect installs exceptions for the following:
C:\Program Files\Harman Pro\Audio Architect 2.25\AudioArchitect.exe
C:\Program Files\Harman Pro\Audio Architect 2.25\HiQNetListener.exe
C:\Program Files\Harman Pro\Audio Architect 2.25\HiQNet NetSetter.exe
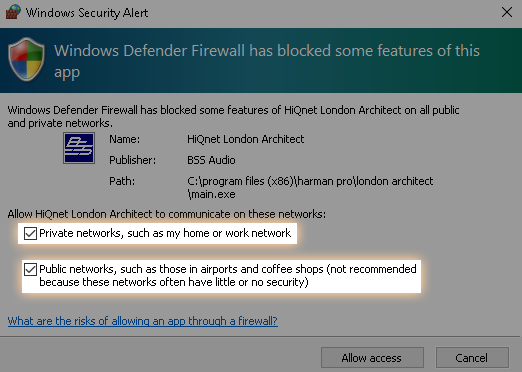
When you launch an application you might also see a prompt allowing you to choose to block or unblock the application. If you choose to not to unblock then you will need to manually unblock this in the Windows Firewall settings.
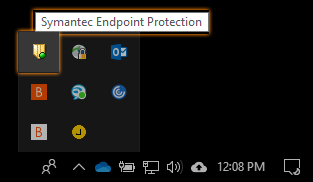
There are many third party firewalls on the market. If one is installed it will probably have an icon located on the task bar to indicate its status. Sometimes it is as simple as right clicking the icon and choosing disable. Other times this will involve IT adding an exception for the application.

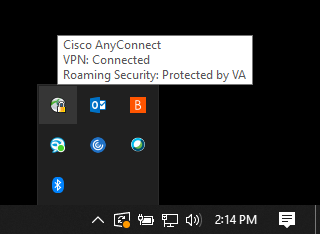
VPN connections encapsulate data over the internet to give you a secure connection. In some cases this can cause issues with device discovery if the VPN is blocking local traffic. If you have a VPN connected try disconnecting the VPN to see if the device shows up by refreshing the network.
Note: this applies only when connecting to local devices. When connecting remotely through a VPN see the HiQNet On A Routed Network Document.

Since the HiQNet software runs on Windows, it is important to verify the actual networking components of Windows are setup correctly.


You can start checking the status of your local computer connection by using the Ipconfig utility. You can run this by opening a command prompt or a PowerShell prompt.
In this case I'm using Windows PowerShell.
In Windows go to search and type powershell
At the prompt type ipconfig
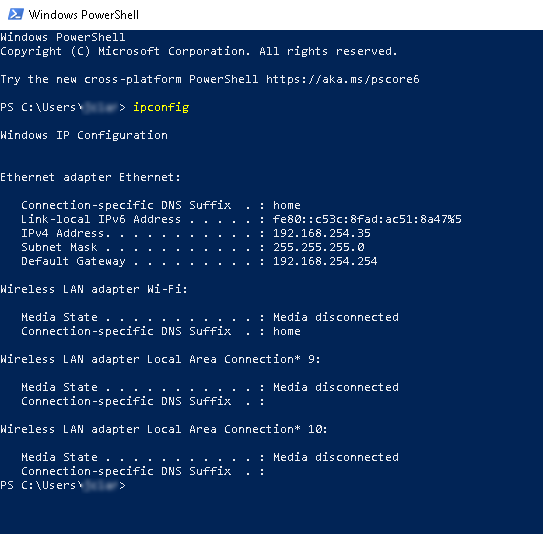
 Window will reply with the states of my network connections. In this case I can see I have one connection connected with an IP address of 192.168.254.35. If your connection shows media disconnected, then you will want to check cabling and the switch.
Also note that it can take Windows up to 45 seconds to obtain an IP address using Auto IP. Sometimes waiting a few seconds after plugging something in will yield results. Once you have verified that the Windows connection has a valid address you can also use PowerShell to ping a device if you know its IP address. If you don't know the IP address go to step 6.0 Network and Device Settings.
In this case I know my BLU806 is at 192.168.254.32 so I can try pinging it.
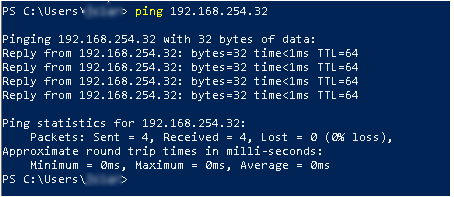

If the device replies back, that indicates the two devices are talking and if the device is not seen by Audio Architect that might indicate an issue with a Network Firewall such as port filtering.
You can also verify communication with a device by typing its IP address in to a browser this will respond back with the web page of the device.
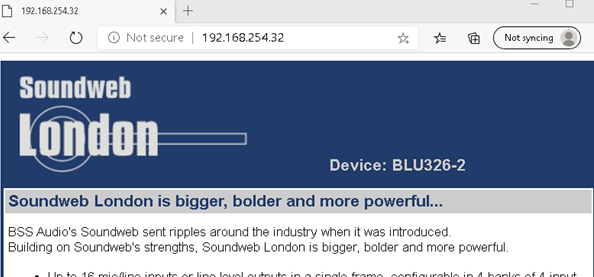
In section 6 we will eliminate the networking and cabling as possible causes for a device not being discovered. We will also reset the device IP address and network settings if all else fails.
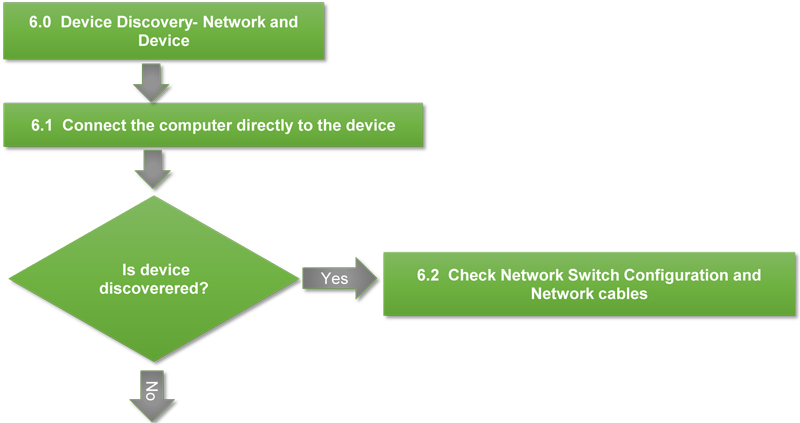

Connecting directly to the device bypasses the network and helps rule out anything with switch configuration. Older computers may require a crossover cable when connecting devices directly together with 100mbit ports. Most modern computer have gigabit network ports. With a gigabit port, auto sensing allows us to plug into two devices directly together without a switch and have them auto-negotiate without having to use a crossover cable.
Once you connect your computer directly to a devices Ethernet port give it a minute to auto negotiate an IP and then check Netsetter.
If the device shows up when you connect directly, then the connection issue is with the network cabling or switch/network configuration. You might wish to test each network cable and try different switch ports. In some cases rebooting/resetting the switch may also help.
Resetting the device network settings to a known Automatic IP state rules out the device configuration causing a problem with discovery. This section is divided into three sections. Each section covers the steps for a particular device type.
DSP's are covered in 7.1 Amps 7.2 and Wall Controllers in 7.3
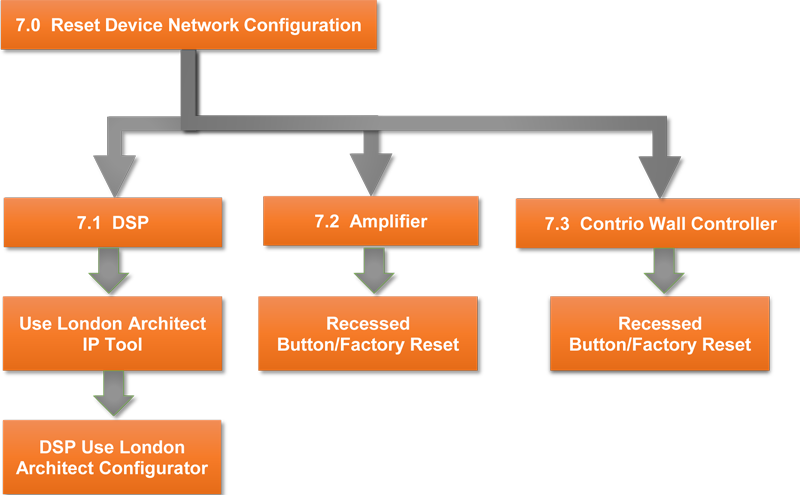
The London IP Tool allow the user to set the IP address of the device using the MAC address. This is useful if you don't know the IP address of the device or the device is outside the range of the PC and is not visible in Netsetter or London Architect. Set the device to automatic IP or assign it a static IP in the same range as your computer and press send. If the unit shows up after reboot you can then readdress it. If the unit doesn't show up or the MAC address sticker has been removed you will need to use the London Configurator to check/set the IP address.
For More info see Using the London Architect IP Tool
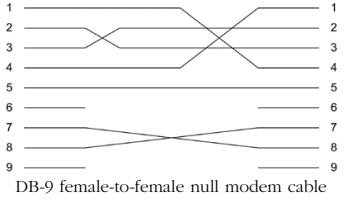
The London Configurator talks to the DSP via the serial connection. This is useful if you need to pull the IP address or if the Ethernet port is not working you can reset the port settings. To use this tool you will need a serial port and a female to female null modem cable.

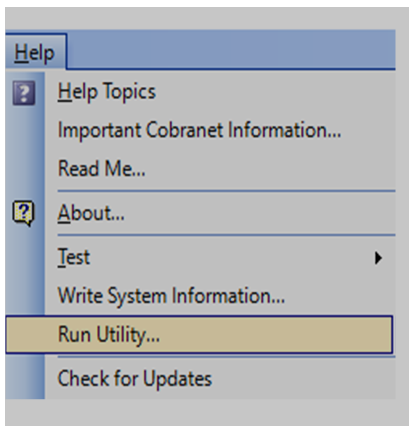
You can get to the London Configurator through London Architect
Help>Run Utility.

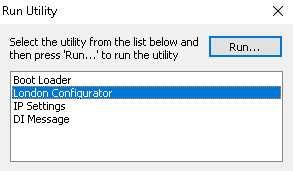
Select London Configurator and run.
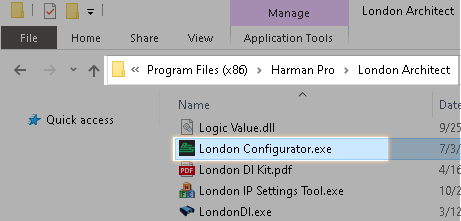
You also find the Configurator in the in the London Architect Folder and launch it this since it is stand alone application.

Once you open the application you will need to select your com port. You should see connected to com port. If you see com already in use make sure to close any other applications using the com port.
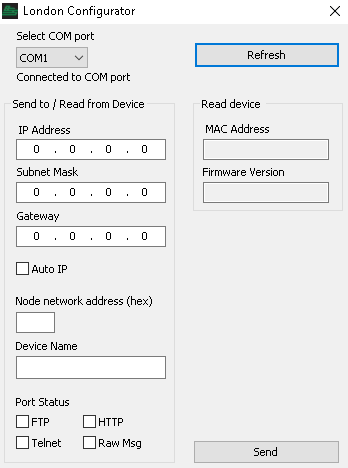
Also make sure the com port is
NOT checked in the London Architect application preferences since this will create a conflict.
Select refresh should pull the information from the DSP.
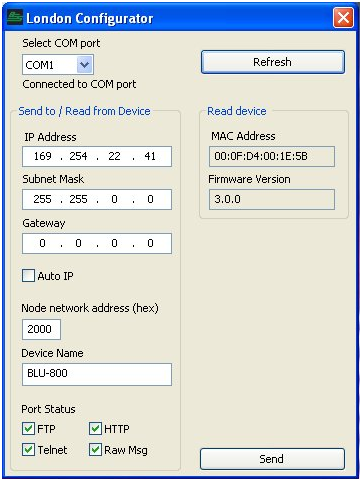
Check the Auto IP button and select Send. This will cause the device to reboot. If not power cycle the box. This should reinitialize the network communication.
ITECH HD/DCI/MAi
To perform the Factory Reset procedure:
Warning! All user presets will be permanently deleted and all settings reverted back to their factory default state. This process is irreversible. If you have any user presets you wish to keep, they should be backed up using Audio Architect before performing the Factory Reset.
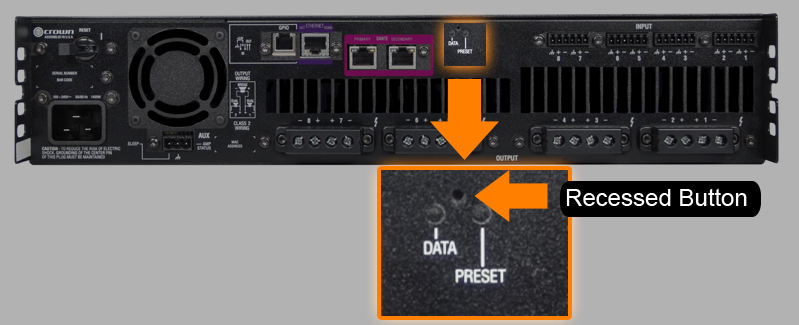
To restore factory default settings: Press the Reset Button with a thin, non-conductive object, then turn on amplifier power, and continue to hold the reset button until the Preset light comes
on green (approximately 16 seconds).."

CDI Amplifier
To perform the Factory Reset procedure:
Warning! All user presets will be permanently deleted and all settings reverted back to their factory default state. This process is irreversible. If you have any user presets you wish to keep, they should be backed up using Audio Architect before performing the Factory Reset.
1 Power off the amplifier by pressing and holding the Power button for 2 seconds.
2 Press and hold the
CH1 and
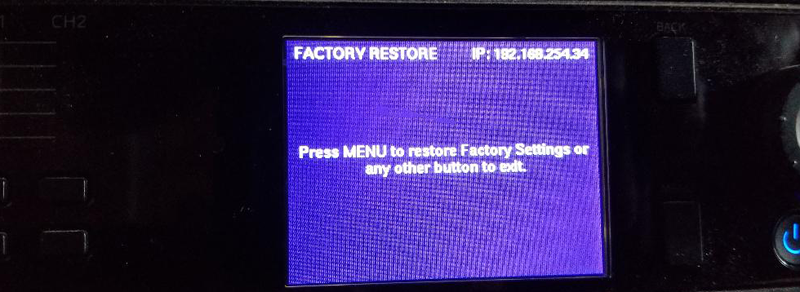
CH2SELECT buttons while powering on the amp. Continue to hold these buttons until the LCD reads: "Press MENU to restore Factory Settings or any other button to exit". Now release the
SELECT buttons.
3 Press and release the
MENU button to start the Factory Reset procedure (pressing any other button will abort the Factory Reset procedure and the amp will boot up normally).
4 Once the Factory Reset procedure begins, the LCD will display the message: "Restoring factory defaults!" and when complete, the device will boot up normally.

7.3 Contrio Wall Controller
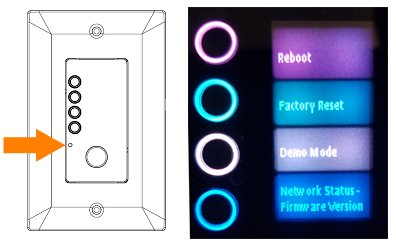
To restore factory default settings: Unplug the wall control. Press the recessed button on the front with a thin, non-conductive object and then plug in the wall controller. The Front panel will display an option to factory reset the wall controller. Pressing the Factory Reset button will reset the device IP address and the device configuration. If using an EC-V, the controller will reset automatically when the recessed located button is held during boot up.
EC4, EC4BV, EC8BV reset menu.
