If your Si console is freezing or failing to store and recall shows, it may need the SD card replaced. Follow the instructions below to replace the SD card. We require that the card is replaced with a 2-8 GB SD card on Si Performer and Si Expression, and a 2-8 Gig MicroSD on the Si Impact. The card must be Class 10 High Speed or better. Anything outside this size range or a lower speed may cause issues.
Si Performer and Si Expression Procedure
Before you begin, prepare your work area with a blanket or other soft surface to lay the console on and a small cup to put small parts in as you disassemble the console. You will need a 2.5mm Hex driver to disassemble the unit.
· Tip the console over so that the top is face down on a soft surface with the bottom of the console facing up.
· Remove all Hex screws on the bottom/front vent panel.
· Remove all Hex screws on the back bottom strip below the XLR inputs and outputs; there is a noticeable break between sections.
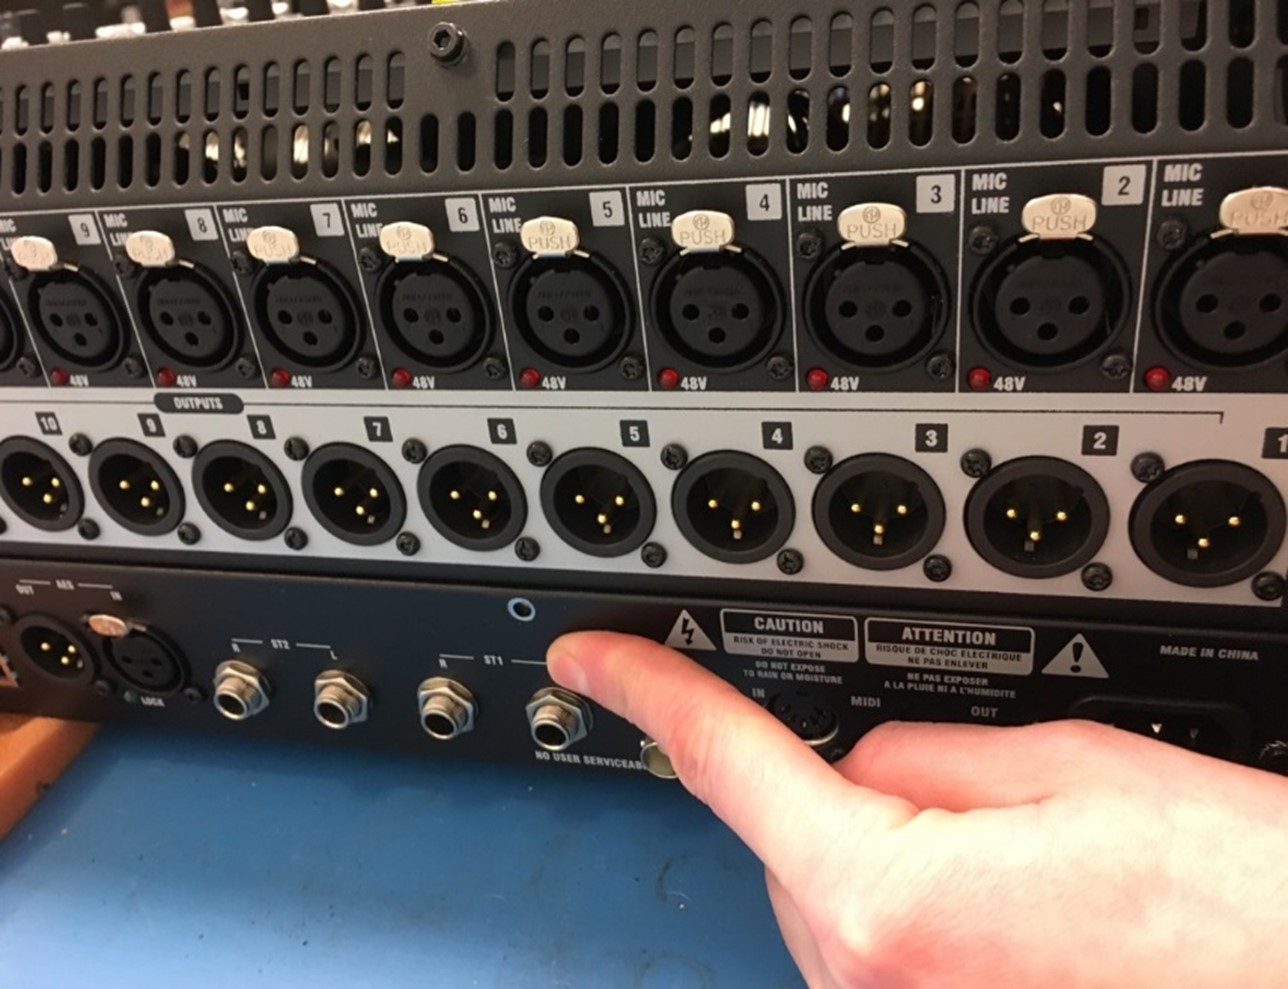
Carefully flip the console back over and hold the front end up so that the weight of the console is resting on the back panel where all of the XLR inputs/outputs reside.
As you can see from the attached picture you just need to pry open the gap between the front vents on the console and the top where the channel faders reside.
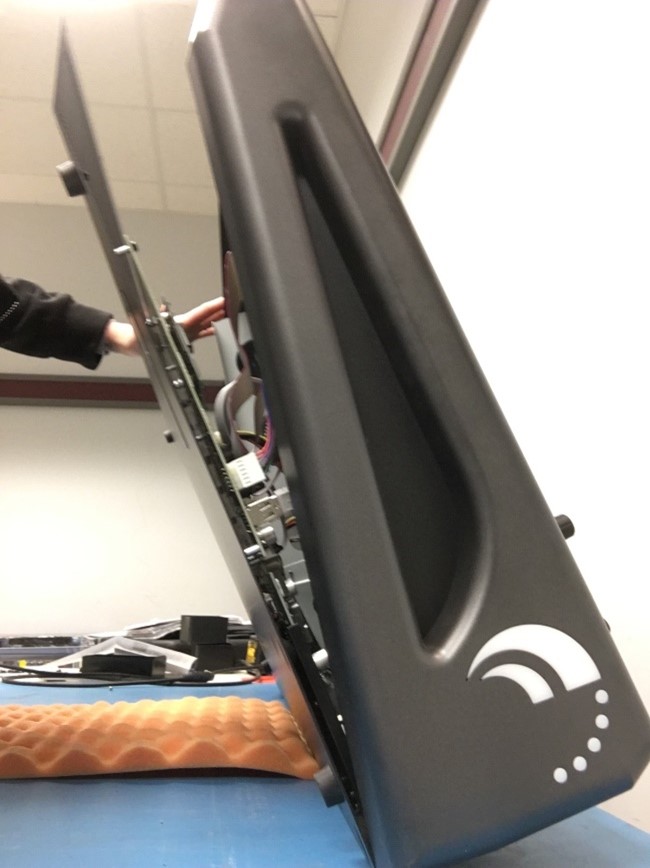
The SD card will be located on the front right side underneath the Master and Mono fader section. On the Si Expression and Si Performer, the SD card pushes in and out to lock or release.
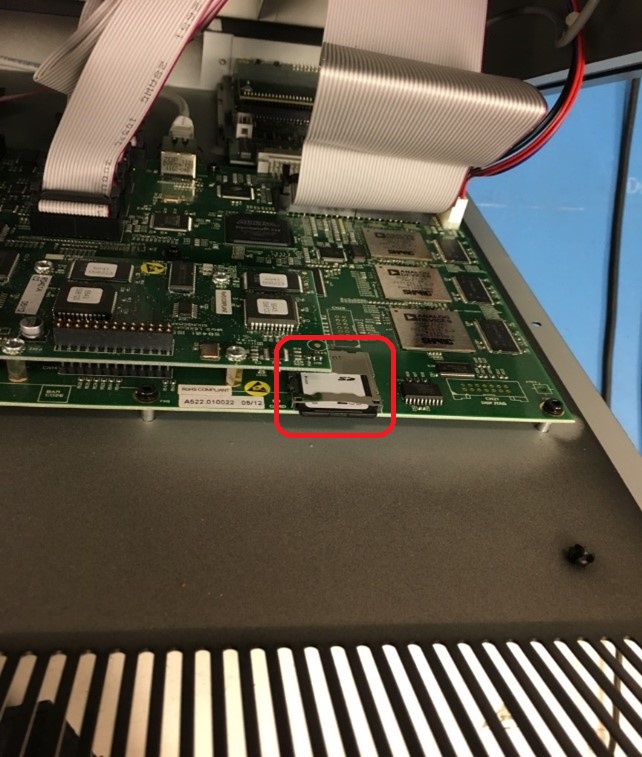
Make sure the SD card is pushed in/seated correctly; you can also check the old card to make sure there is no corrosion or anything else out of the ordinary.
Go to the Format Procedure below.
Si Impact Procedure
Flip the console over so that the top is face down on a soft surface with the bottom of the console facing up.
Remove the 3 socket-head screws on each end cheek and remove the end cheeks.
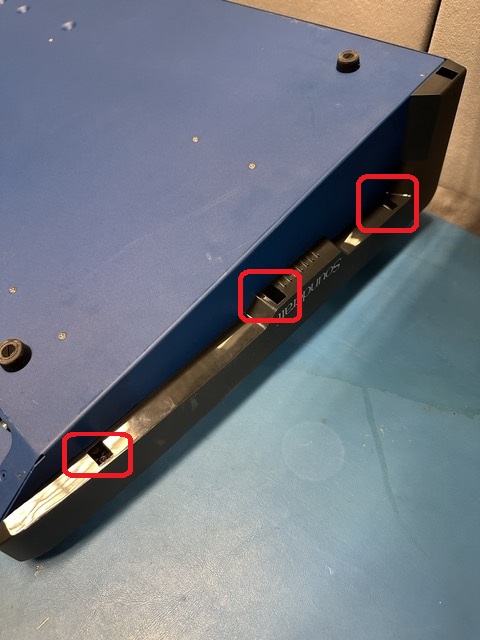
Flip mixer over and remove the 2 screws on each end.
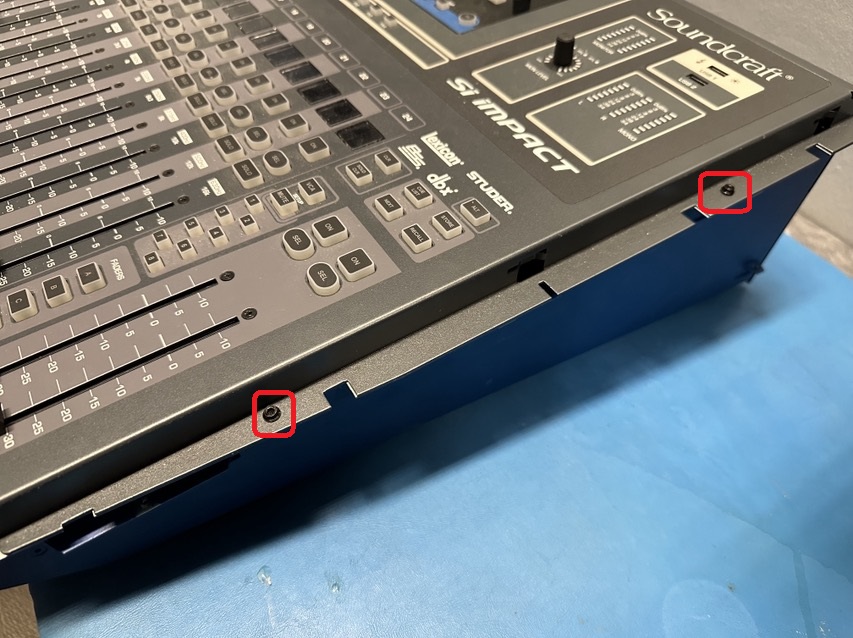
Remove 4 screws from top rear of mixer.

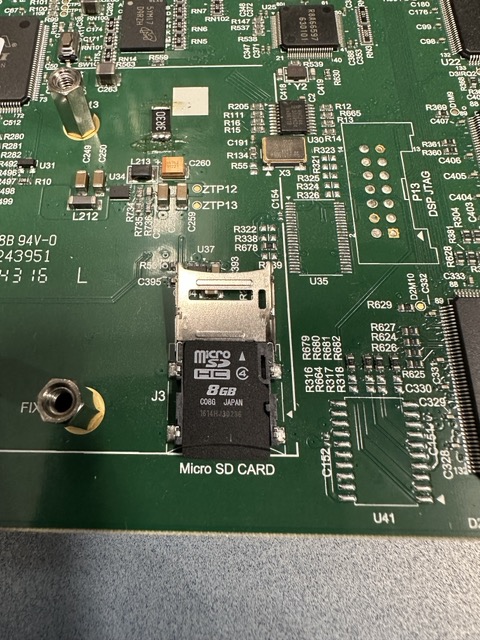
Lift top part of mixer off and place to rear. You will see the Micro SD card on main board.
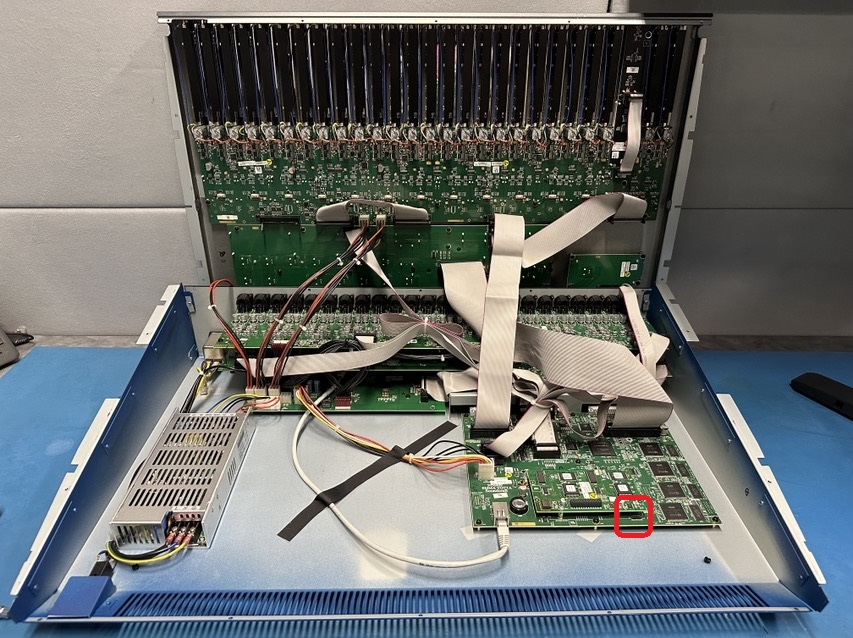
To release the MicroSD card, push back on the top shield. The shield will lift or flip up. Then lift the MicroSD card straight up and off to remove. Lay the new MicroSD card in the socket in the correct position, then close metal shield and pull forward to lock. There is a small amount of play when pushing or pulling on the MicroSD card.
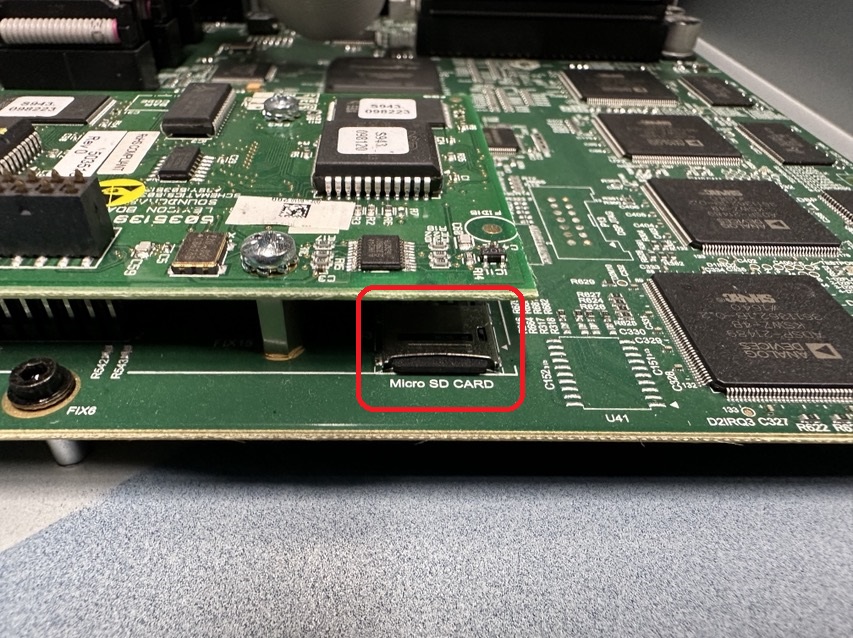
Here are images of what the card and hood look like with the board above it removed. You should not have to remove that board.
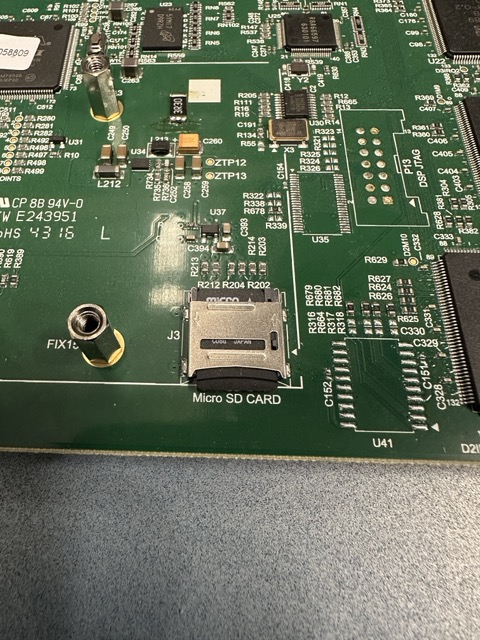
Go to the Format Procedure below.
SD Card Format Procedure
The SD card needs to be formatted in the console when the card is replaced.
Si Performer and Si Expression
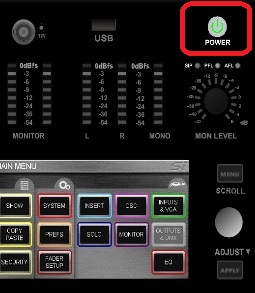
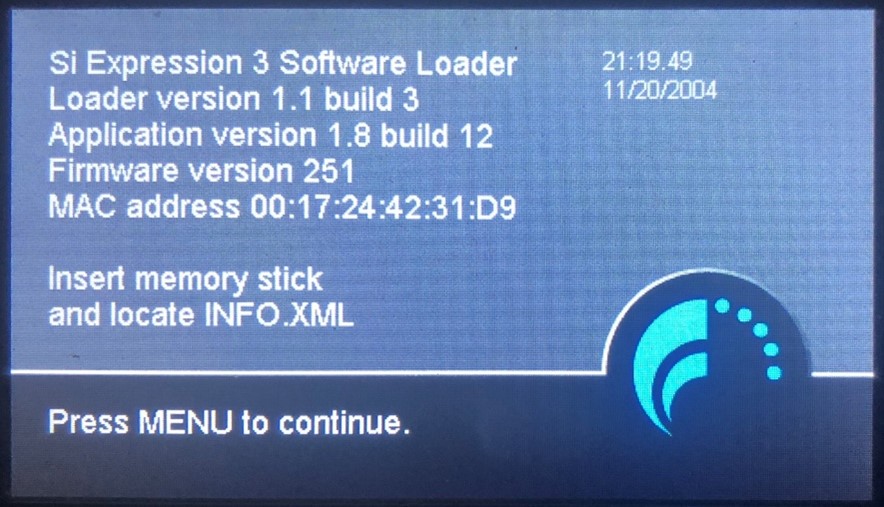
Put the console into Boot/Software loader mode by pressing and holding the flashing power button. Keep holding until the screen changes to the bootloader screen and prompts to Hit Menu To Continue. Do NOT hit the Menu button at this time.
Go to File Manager section below.
Si Impact
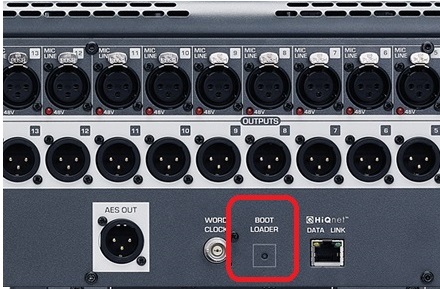
Press and hold the Bootloader button on rear of mixer, then turn on power. Hold until screen changes to the bootloader screen and prompts to Hit Menu To Continue. Do NOT hit the Menu button at this time.

Go to File Manager section below.
File Manager
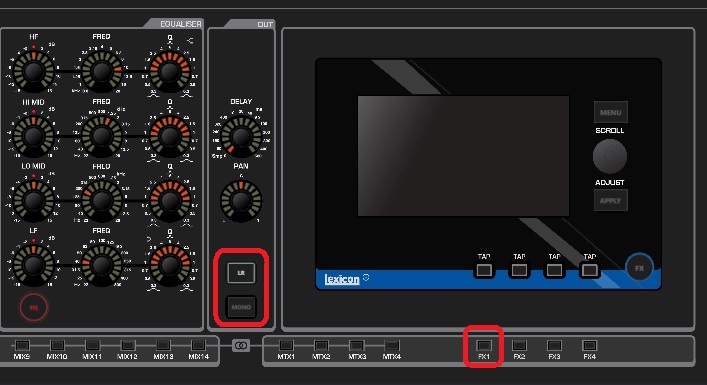
Next, Press and Hold LR, then add MONO, then add FX1 buttons, in that order.
Release all buttons. You will see this screen.
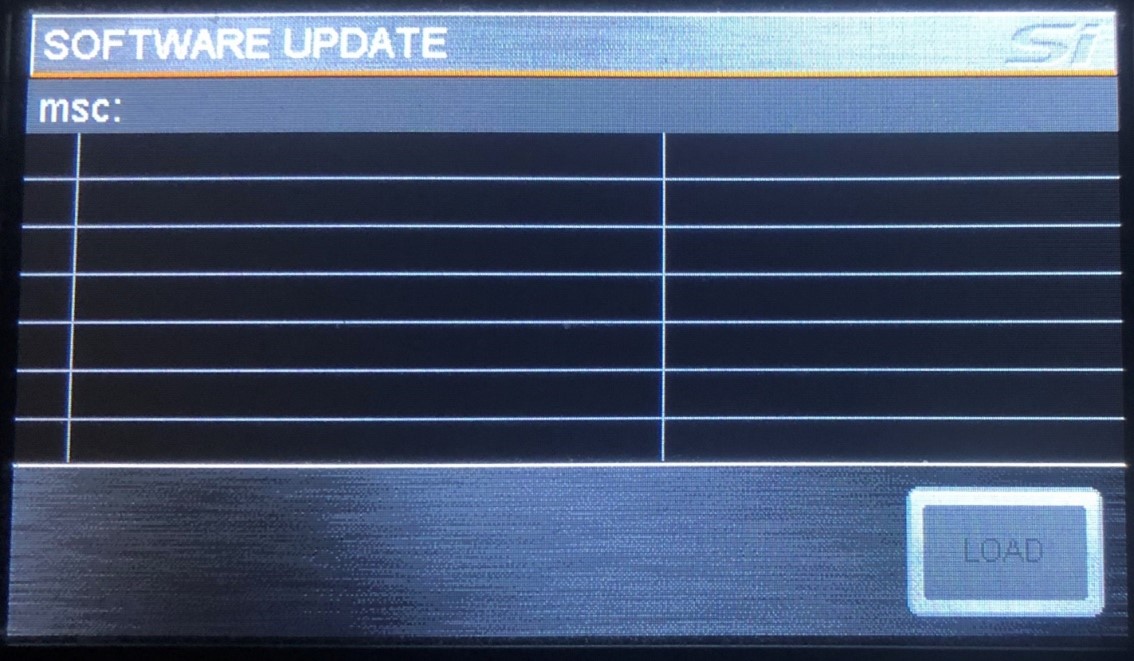
Repeat (Press and Hold LR, then add MONO, then add FX1 buttons, in that order).
Release all buttons. You will see this screen.
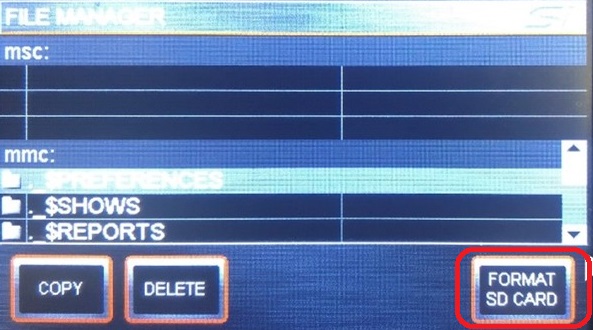
Press FORMAT SD CARD on the screen. FILES UNDER MMC SHOULD CLEAR.
Power cycle the console.