The Soundweb London BLU-10 network wall controller features a touchscreen, rotary encoder, two navigation buttons and an infra-red proximity sensor. It can be configured with up to 100 pages which can be nested into folders. Each page can hold up to eight different functions which can be parameters, presets or page transitions. Pages and folders can be password protected. The BLU-10 is available in three colours.

The BLU-10 communicates with BSS, Crown, dbx and JBL devices across an Ethernet network. Its configuration is created and loaded using the Audio Architect application (version 1.95 onwards). It functions as standalone device and is not driven by a Soundweb London chassis.
Mechanical Installation
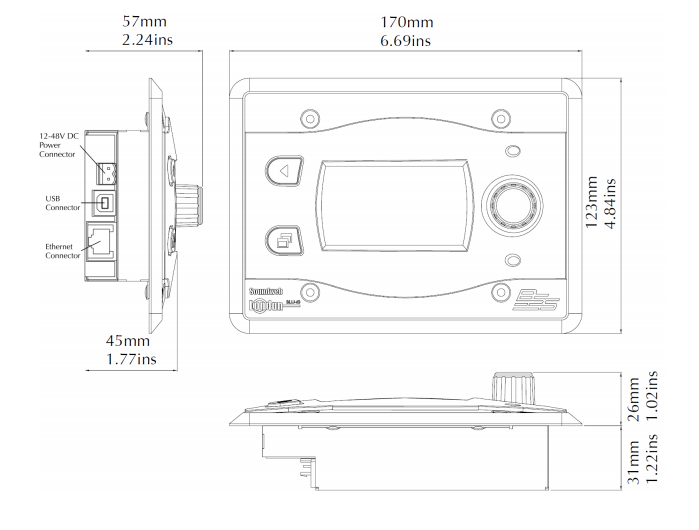
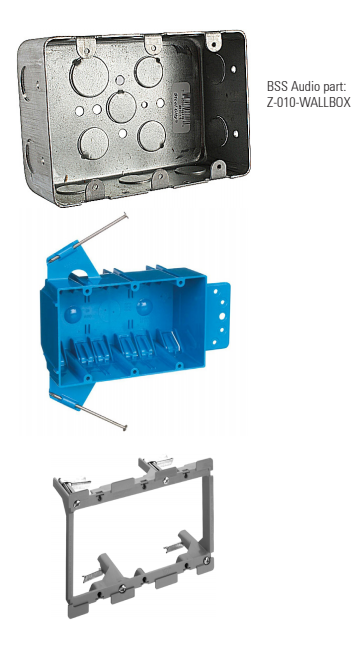
The BLU-10 is designed to be fitted in a 3-gang US wall box or bracket. Screws are provided to fix the unit in place. Note that cable connections are located on the side.
Power and Connections
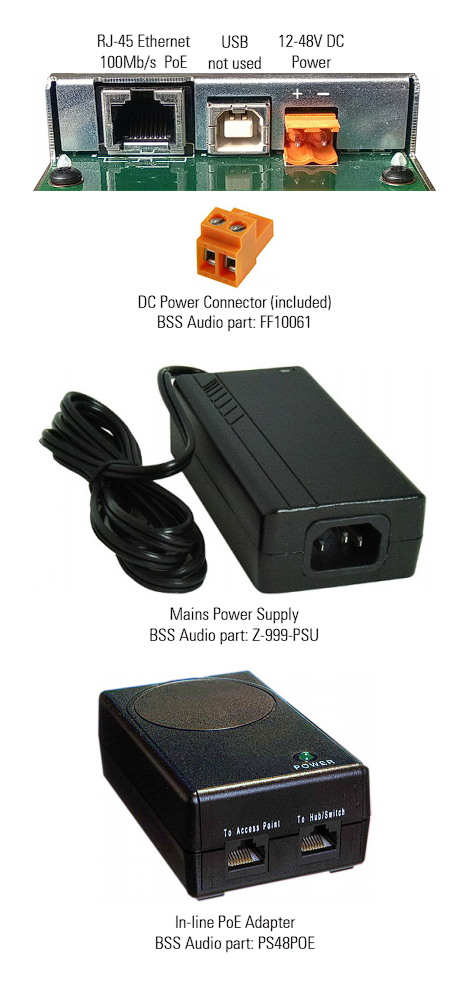
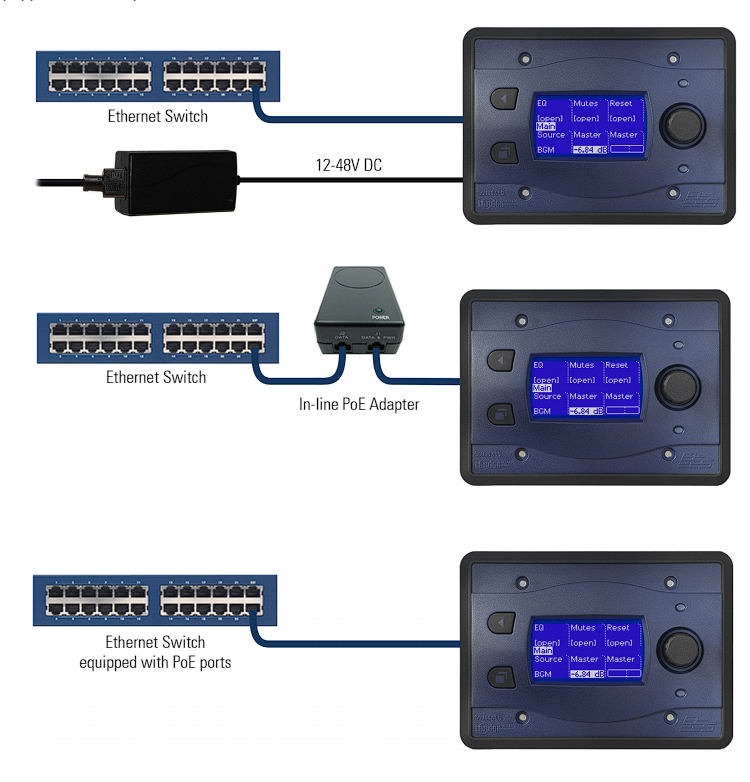
The BLU-10 can be powered directly with a 12-48V DC supply using the included terminal block connector. Alternatively, it can be powered through the Ethernet connection using Power over Ethernet (IEEE802.3af). Power over Ethernet can be supplied from an in-line adapter or an Ethernet switch equipped with PoE ports.
Setting the IP Address
The BLU-10 will be set in Auto IP mode from the factory. It will acquire an IP address if a DHCP server is present otherwise it will assign itself with an APIPA address (169.254.xxx.xxx/16) after thirty seconds.
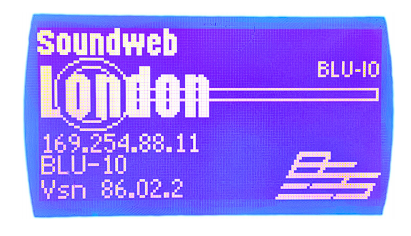
A BLU-10 with no configuration loaded will display its IP address, Device Name and firmware version.
If the BLU-10 is not in the same IP address range as the PC then it can be discovered in NetSetter. The Status column will show the device as “Discovering...”

The settings can be changed to a static IP address by un-ticking Auto IP and editing the IP Address, Subnet Mask and Default Gateway. Click Apply Current Edits below when completed. When the BLU-10 is in the same IP address range as the PC the Status column will show the device as “Discovered”.

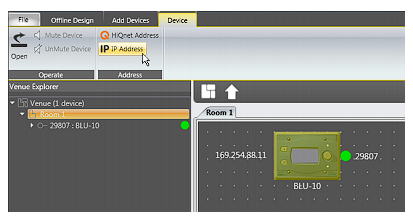
If the BLU-10 is already in the same IP address range as the PC then it will be discovered in Audio Architect. It is possible to change the IP address of the BLU-10 can be changed once it has been added to the venue and matched. Select it with a left-click and then click IP Address in the Device tab that appears.
Getting started
Programming the BLU-10 consists of adding pages and assigning parameters, presets or page navigation functions to each button. Double-click on the BLU-10 in the venue to open the wall controller editing page. The Venue Explorer will show the BLU-10 pages as a hierarchical list.
Managing pages and folders
BLU-10 pages can be organised into folders and subfolders or kept as a flat list. An operator can navigate between pages by pressing the Page button and selecting from a list or, by touching page transition buttons assigned to a page. When using the Page button, it is possible to navigate to any page or folder. Page transition buttons only allow navigation to pages within the same folder. The folder structure will therefore determine how the operator is able to navigate between pages.
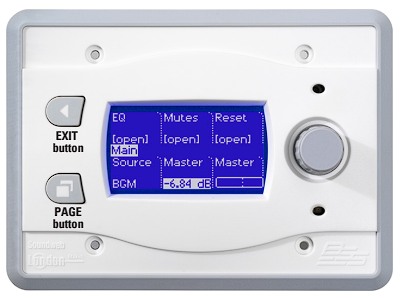
One page will be designated as the Start Page which appears when the BLU-10 is first loaded with a configuration or when it is subsequently rebooted. The Start page can also be made to appear after a specified period of inactivity using the Start Page Enable feature on the Default Control Panel.
Password security can be set on pages and folders. The operator must enter an alphanumerical or numerical password to access a protected folder or page.
Managing buttons
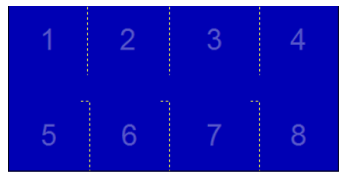
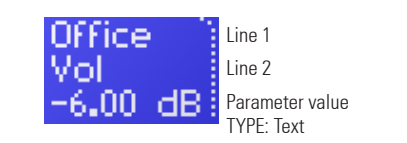
Each BLU-10 page can hold between one and eight buttons. Buttons 1-4 appear in the top row and buttons 5-8 in the bottom row. Each button can accommodate two lines of customisable text below which is displays the value of the parameter assigned. The width of each button can be adjusted.
A button can be assigned with two-state parameters (e.g. Mute, Logic Source), multistate parameters (e.g. Source Selector) or continuous parameters (e.g. Gain). The parameter can be displayed as text or as a meter. A button can change a parameter when touched or can display it. Buttons can also be used to trigger Parameter Presets or navigate to another BLU-10 page.
Device settings and functions
The BLU-10 global settings are adjusted on the Default Control Panel. This panel is launched by right-clicking the BLU-10 in the Room View and selecting Show Default Control Panel.
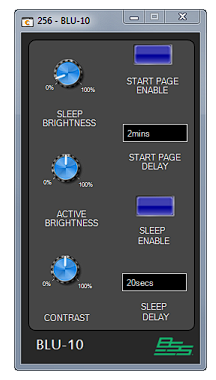
The viewing angle of the screen can be optimised by adjusting the Contrast. The brightness of the screen’s backlight can be adjusted for when the device is in Sleep mode or when the screen is active. When Start Page Enable is On, the device will automatically display the Start Page after a period of inactivity determined by the Start Page Delay. This can be set between 10 seconds and 60 minutes.
When Sleep Enable is On, the screen brightness will automatically change to the level determined by the Sleep Brightness after a period of inactivity determined by the Sleep Delay. This can be set between 10 seconds and 60 minutes. During sleep, the device can be activated by touching the screen, turning the encoder or when a hand is detected by the infra-red sensor from approximately 15cm.
�Adding pages and folders
Double-click on the BLU-10 in the Room View to open the wall controller editing page. The Venue Explorer will display the BLU-10 pages as a hierarchical list.
BLU-10 pages and folders are added under the Top Level Folder. The first “Unnamed” page appears as a starting point.
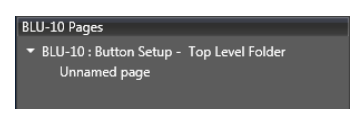
Additional pages and folders can be added, removed, renamed or moved by right-clicking an item and selecting from the context menu. In addition, a page can be designated as the Start Page and password security can be set on pages and folders. The name of the page will be used as the page title that appears in the middle of the BLU-10 screen.
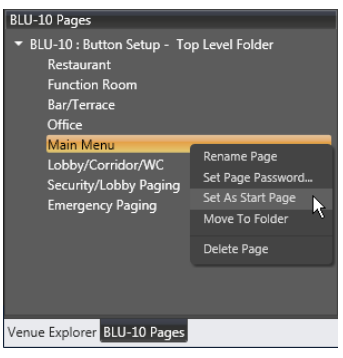
Assigning functions to buttons
Button functions are assigned and customised in the BLU-10 editing page. Double-click on a page in the BLU-10 Pages list to display its button assignments.
Audio and Logic parameters can be dragged and dropped directly from the Venue Explorer onto the blue button display or into the Buttons column. Audio and Logic parameters can also be assigned from Default Control Panels by dragging and dropping while holding down the CTRL key.
Parameter Presets can be can be dragged and dropped directly from the Parameter Presets list in the Venue Explorer.
To configure a button so that it opens another page, drag and drop a page directly from the BLU-10 Pages list. Page transitions can only be created between pages in the same folder.
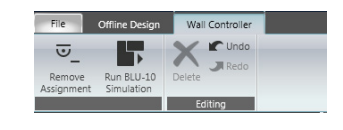
Assignments can be removed by selecting a button and then clicking Remove Assignment in the Ribbon.

�
Managing button width
The Button Width column determines the width of a button measured in pixels. This value includes a 2-pixel separator on each side of the button. For example, if the Button Width is set to 40, then there will be 36 pixels of usable width for text. The width of the LCD is 128 pixels therefore the total width of the buttons must not exceed 128.
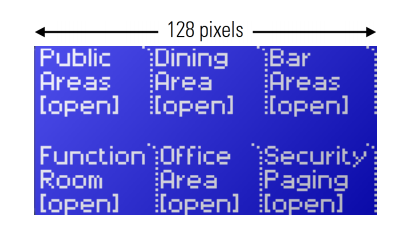
Buttons with no assignments will not be displayed and, those with assignments will be left-justified. For example, if only buttons 1, 2 and 4 are assigned, then button 3 will not be displayed and button 4 will be shifted to the left beside button 2.
Button settings
MOMENTARY: For use with two-state parameters (e.g. Mute, Logic Source). Assigned parameter will turn on while button is held down and will turn off when released.
INVERSE: Used in conjunction with Momentary setting. Assigned parameter will turn off while button is held down and will turn on when released.
LINE 1/LINE 2: Custom text will appear on the button. Default parameter name will appear if left blank.
READONLY: Parameter value will not change when button is pressed.
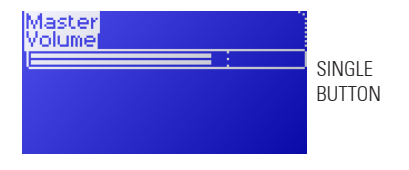
TYPE: (Text/Meter) Parameter value can be displayed as text or as a meter. Dotted line indicatesunity gain (0dB)
CUSTOM VALUE STRINGS: Customises the parameter values displayed for two-state (e.g. Mute) or multi-state parameters (e.g. Source Selector)
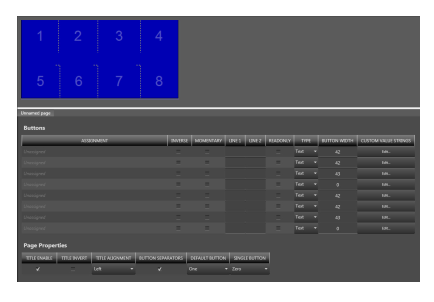
Page properties
TITLE ENABLE: Displays or hides the page title.
TITLE INVERT: Displays the page title in inverted colors.
TITLE ALIGNMENT: Determines the horizontal position of the page title.
BUTTON SEPARATORS: Displays or hides the button separators.
DEFAULT BUTTON: Determines which button is active when page is opened.
SINGLE BUTTON: Determines which button is used as a single button. For example, if set to One, then only button 1 will appear on the page. When set to Zero, all buttons will appear on the page.

�
BLU-10 Simulation
The operation and appearance of the BLU-10 can be simulated within Audio Architect by clicking BLU-10 Simulation in the ribbon. The screen, navigation buttons, screen buttons and encoder will appear and operate exactly as they would on the device. Changes to the pages and properties can be viewed quickly without having to go online and load the configuration into the device.
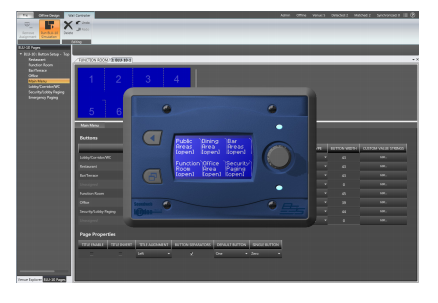
Navigation buttons, screen buttons and encoder are operated using the mouse. To return to the editing page, right click and select End Simulation.
Operation
Once the configuration has been loaded, the BLU-10 will show the Start Page and page navigation will function. The parameter values will be synchronised and displayed once the BLU-10 has connected to the Soundweb chassis devices. If the BLU-10 loses contact with the Soundweb chassis device then the parameters will not be displayed.
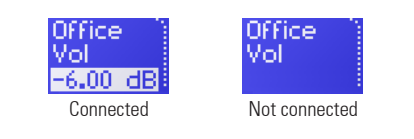
Screen buttons
TWO-STATE PARAMETERS: Touch button to change the parameter.
SOURCE SELECTORS: Touch button and list will appear. Move up and down with the encoder or touch the top half of the screen to move up and the bottom half to move down. Then click OK.
PARAMETER PRESETS: Touch button to recall Parameter Preset.
CONTINUOUS PARAMETERS: Touch button and adjust with the encoder. Alternatively, hold down button and a graph will appear. Adjust by swiping to the left or right. Then click OK.
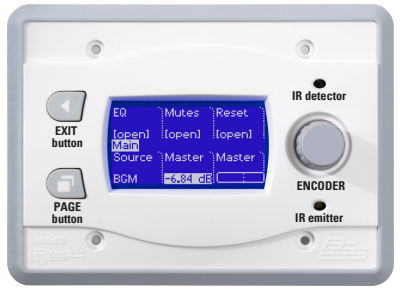
Navigation buttons
PAGE button: Displays the list of pages and folders as they appear in the BLU-10 Pages tab in the Venue Explorer. Move up and down with the encoder or touch the top half of the screen to move up and the bottom half to move down. Then click OK.
EXIT button: Returns to a Page when viewing the page and folder list or when viewing a Source Selector. Double tapping activates the Locate function.
�