Installing Firmware on Soundcraft Si Series Consoles
01. Unzip the files to a USB key in the root directory, you should have three files:
yourconsolename.bin
info.xml
Faderv1_1Build13.hex
02. Switch the console off using the POWER key (or power switch on Si Impact).
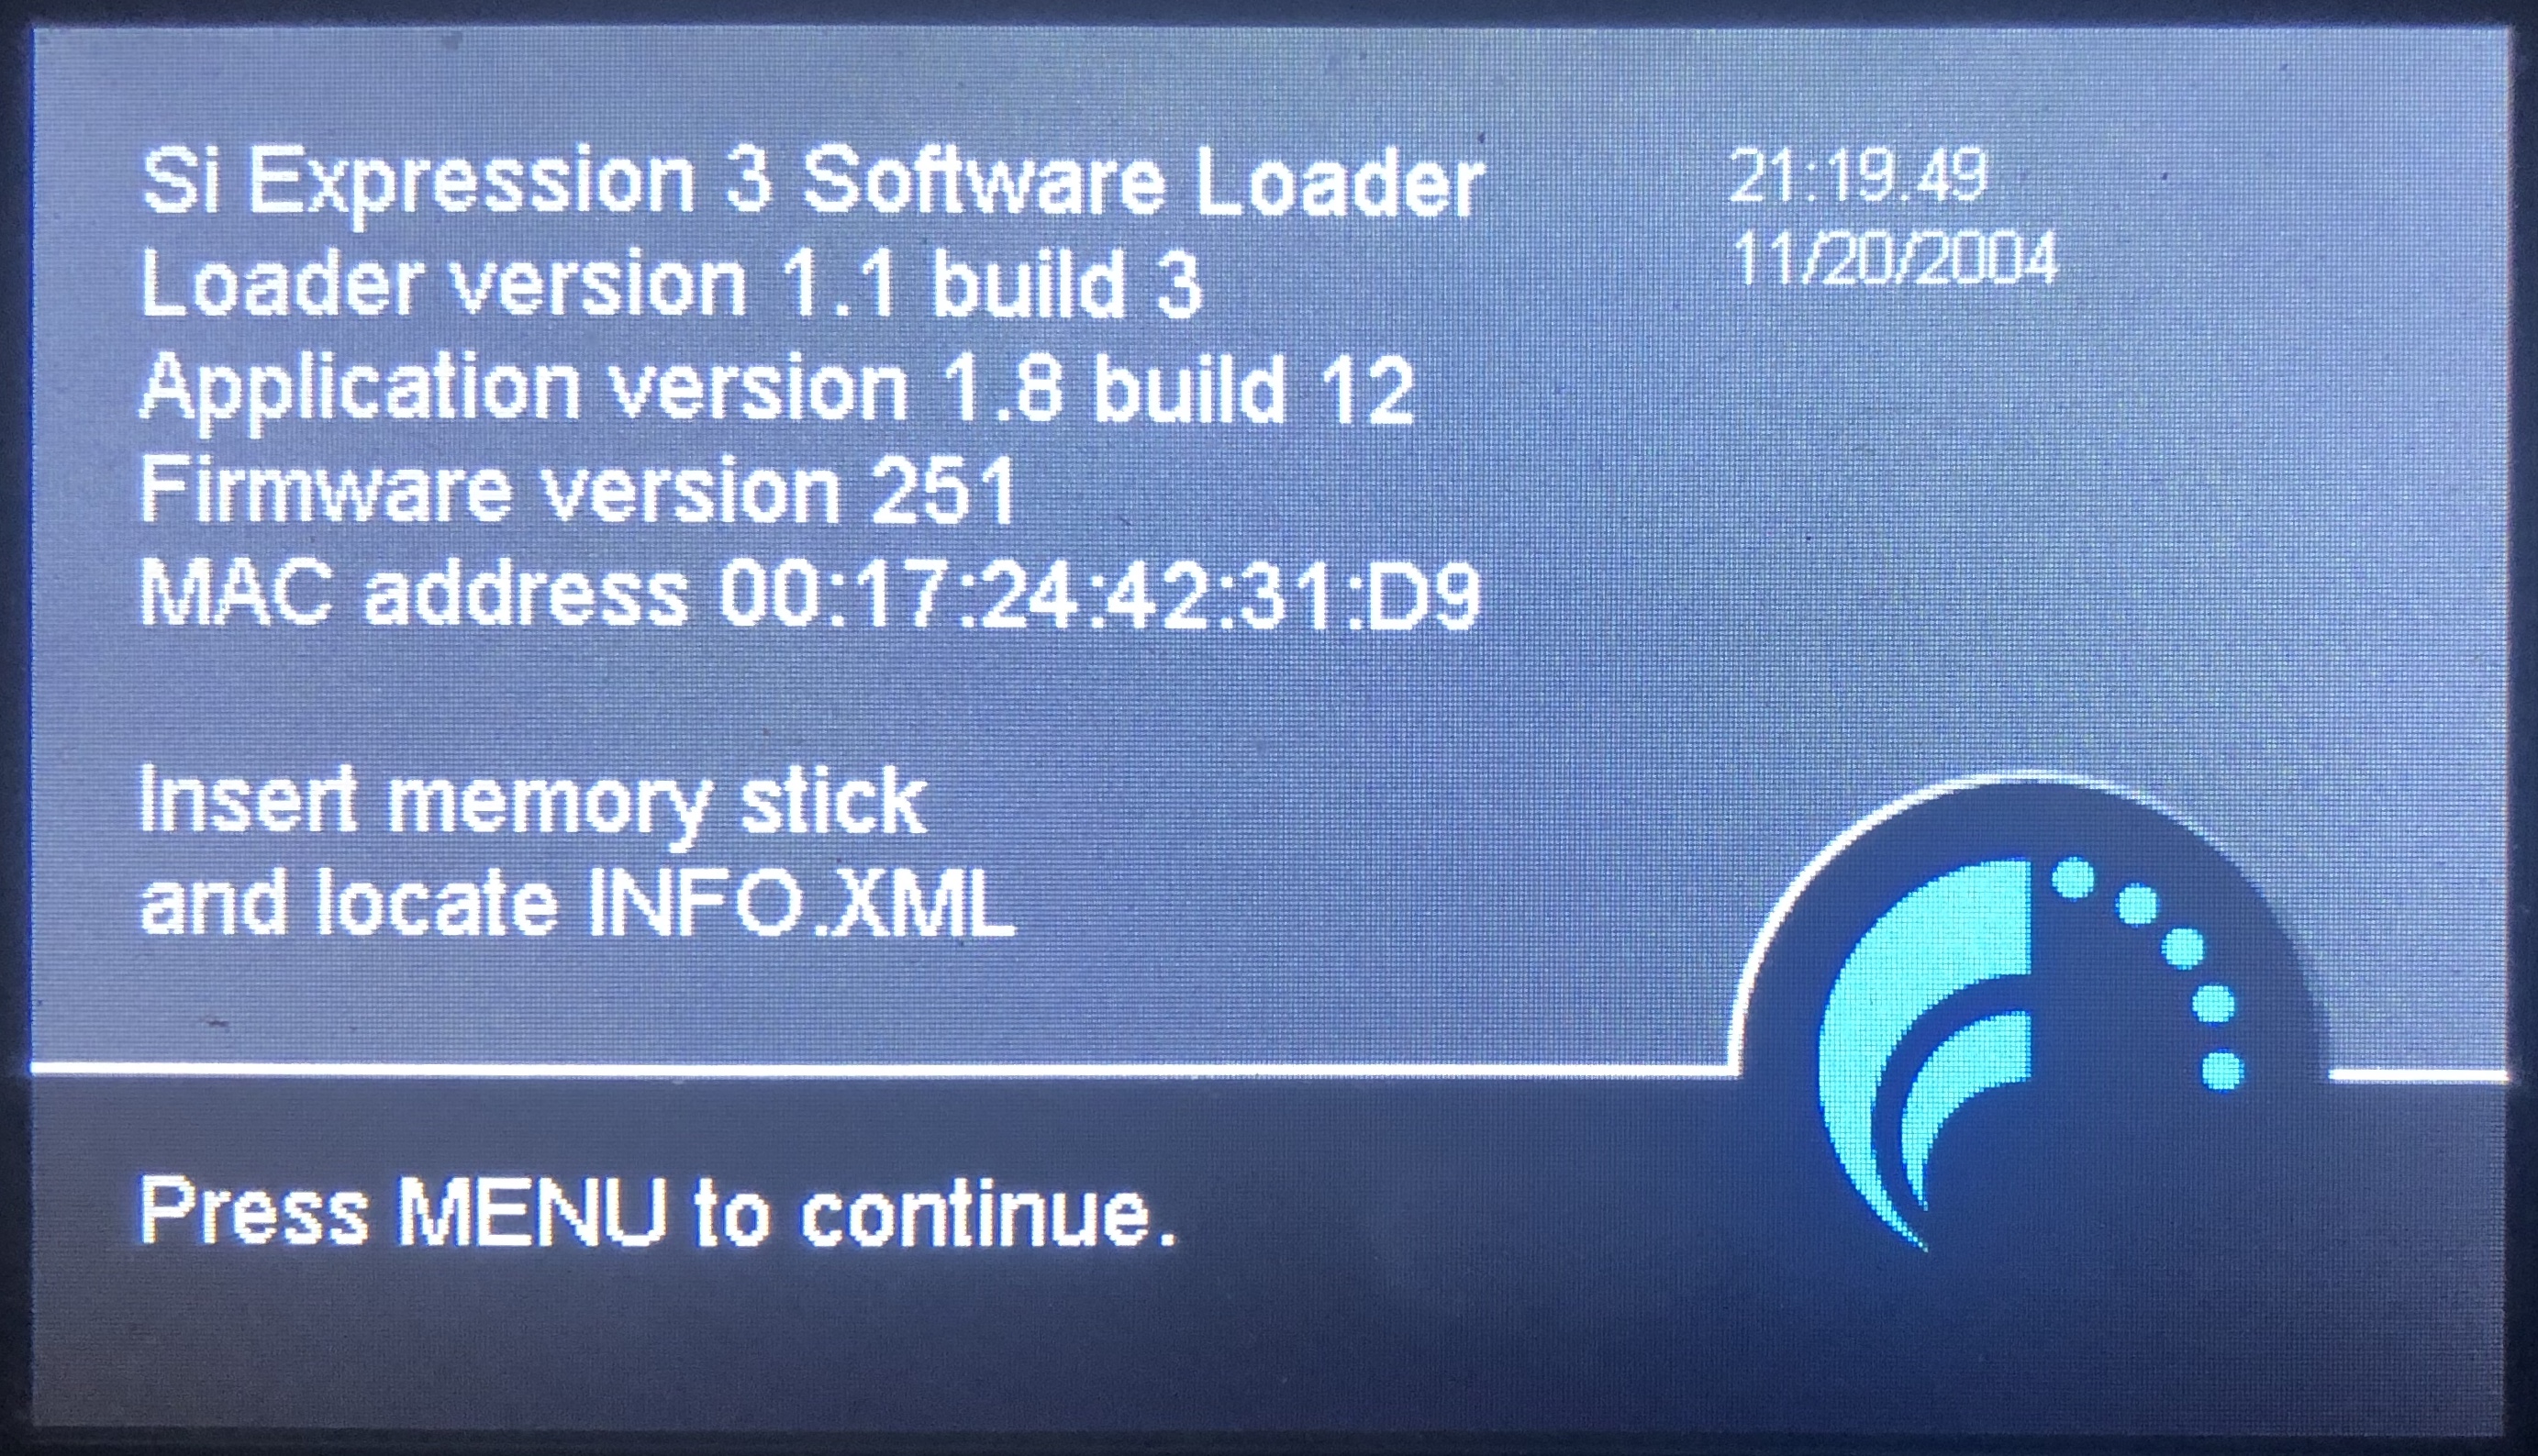
03. Press and hold the POWER key for approx 5 seconds, a SOFTWARE LOADER screen will appear.

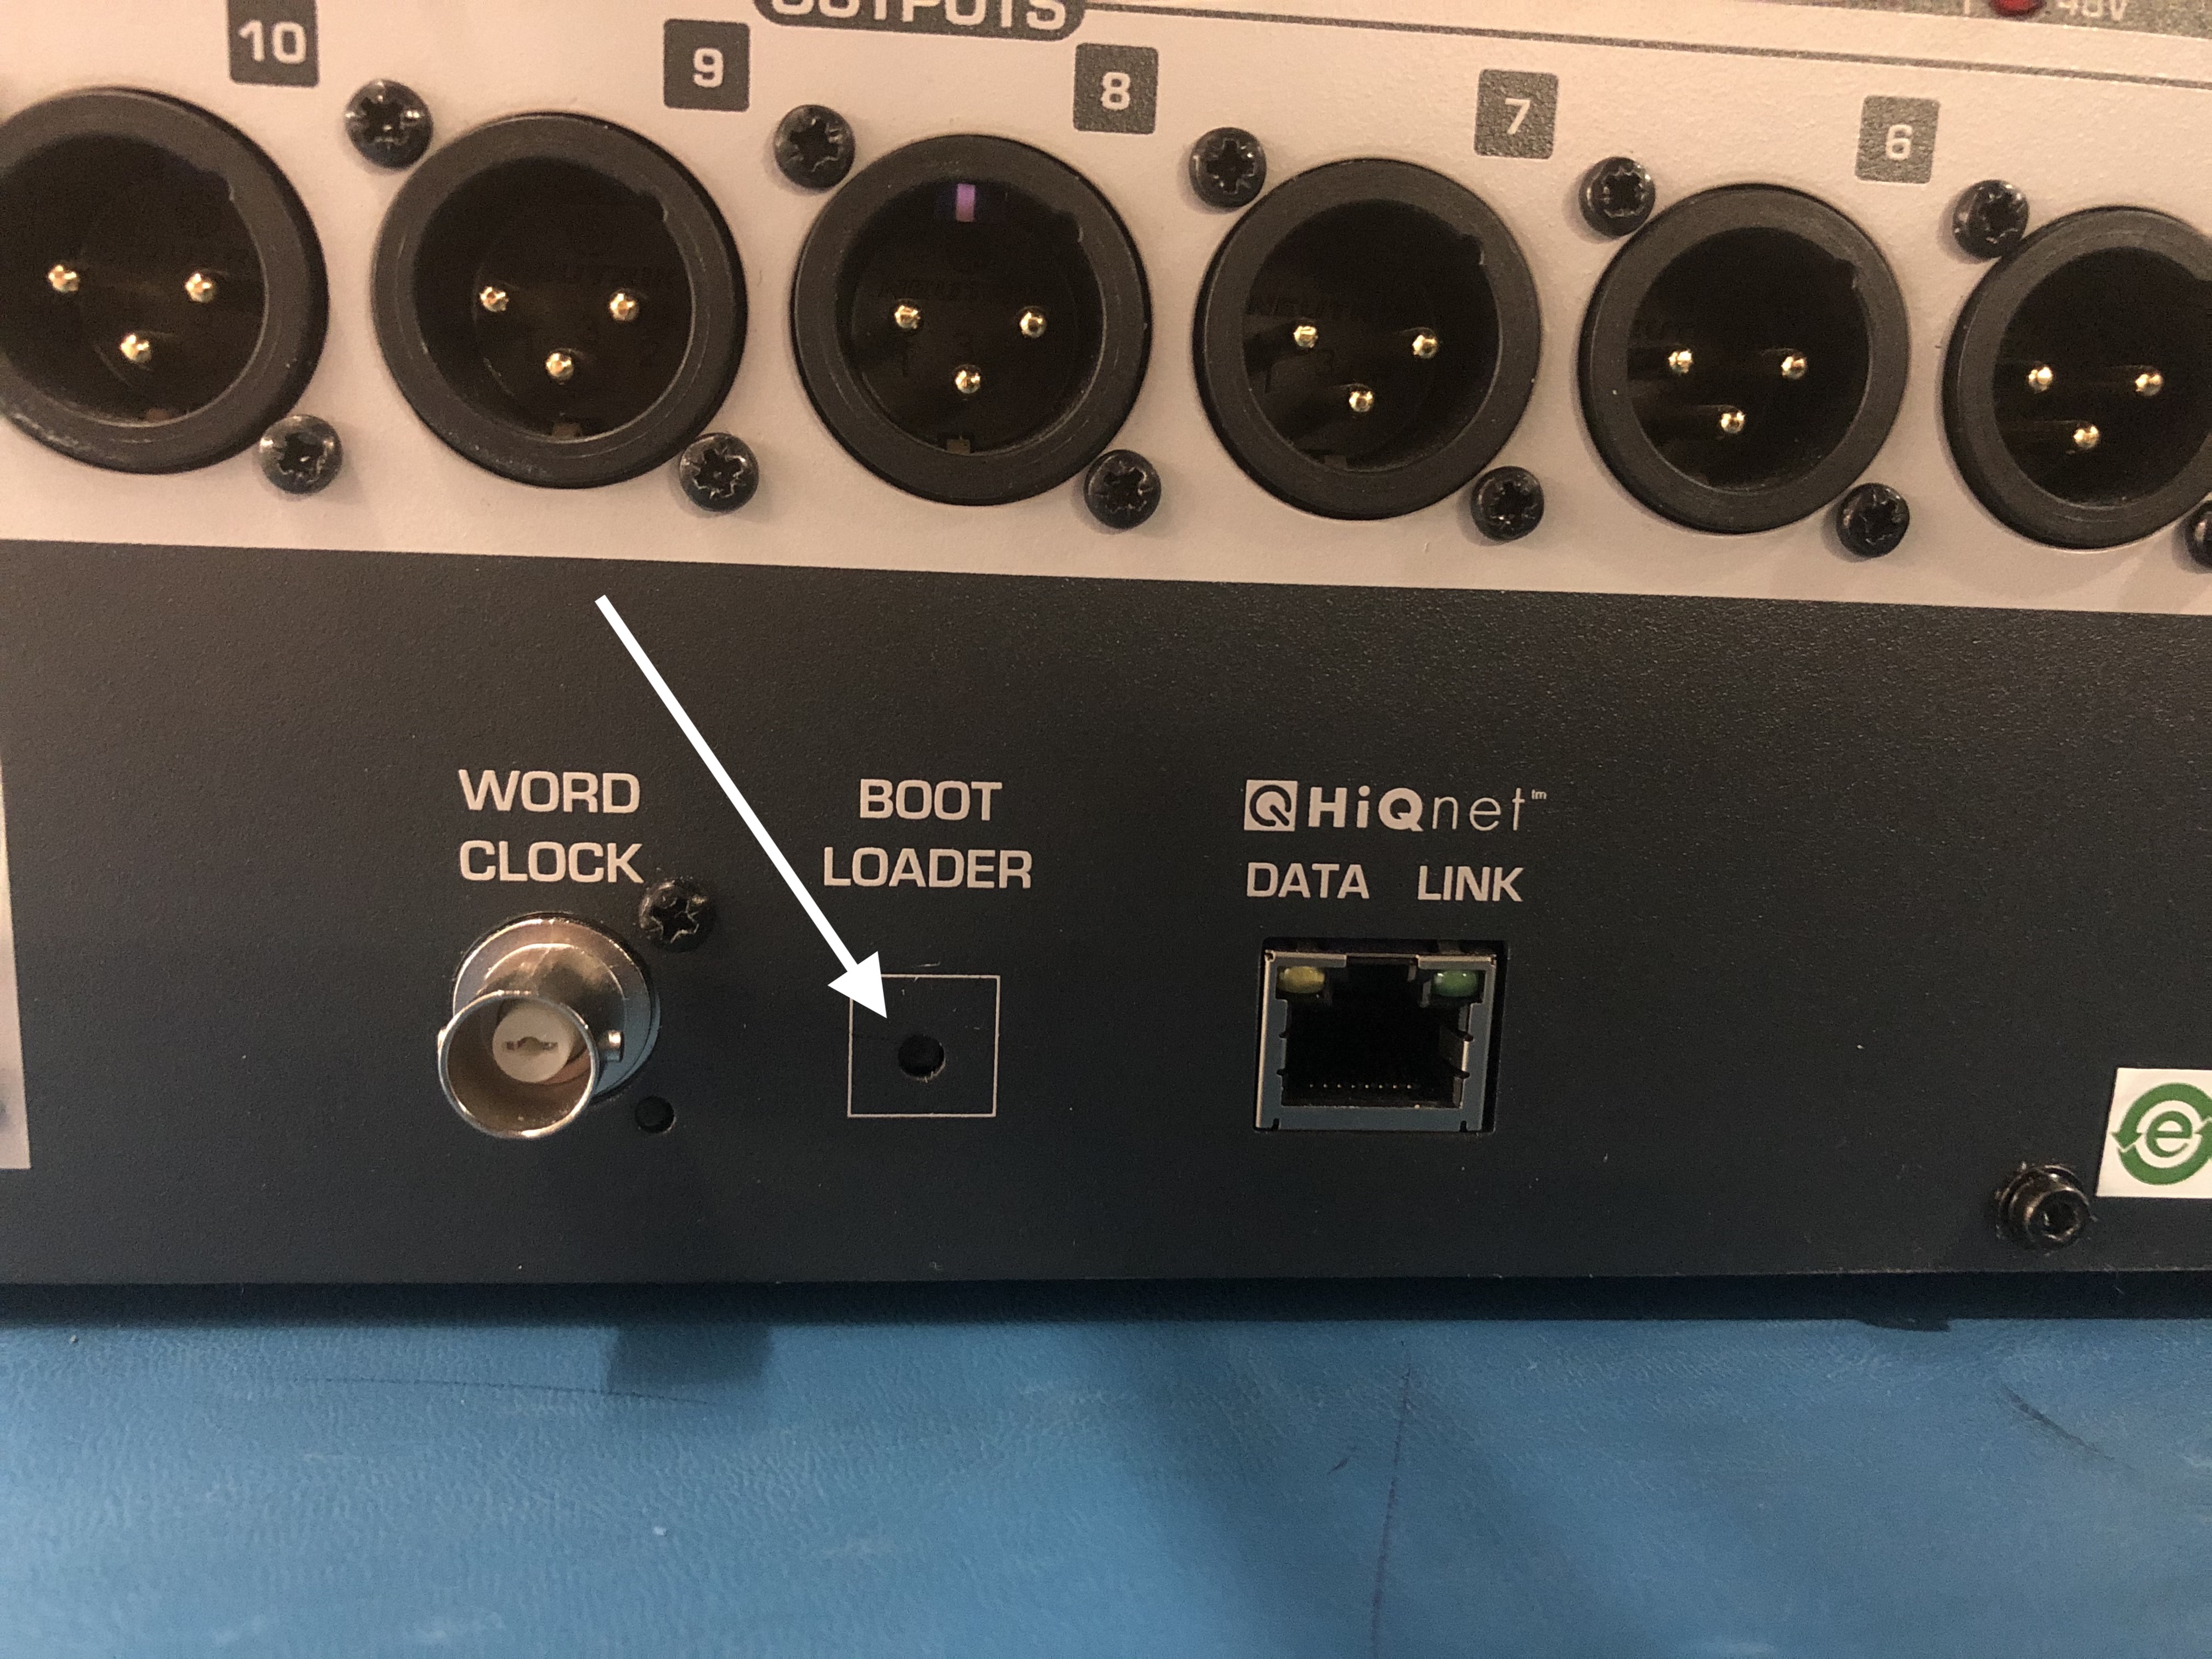
(For Si Impact, hold down Boot Loader button, then turn on power switch while holding button until SOFTWARE LOADER screen appears)

04. Insert the USB stick and then press the MENU key.
05. If the fader firmware requires updating this will be prompted on the touch screen;
follow on-screen instructions for this process.
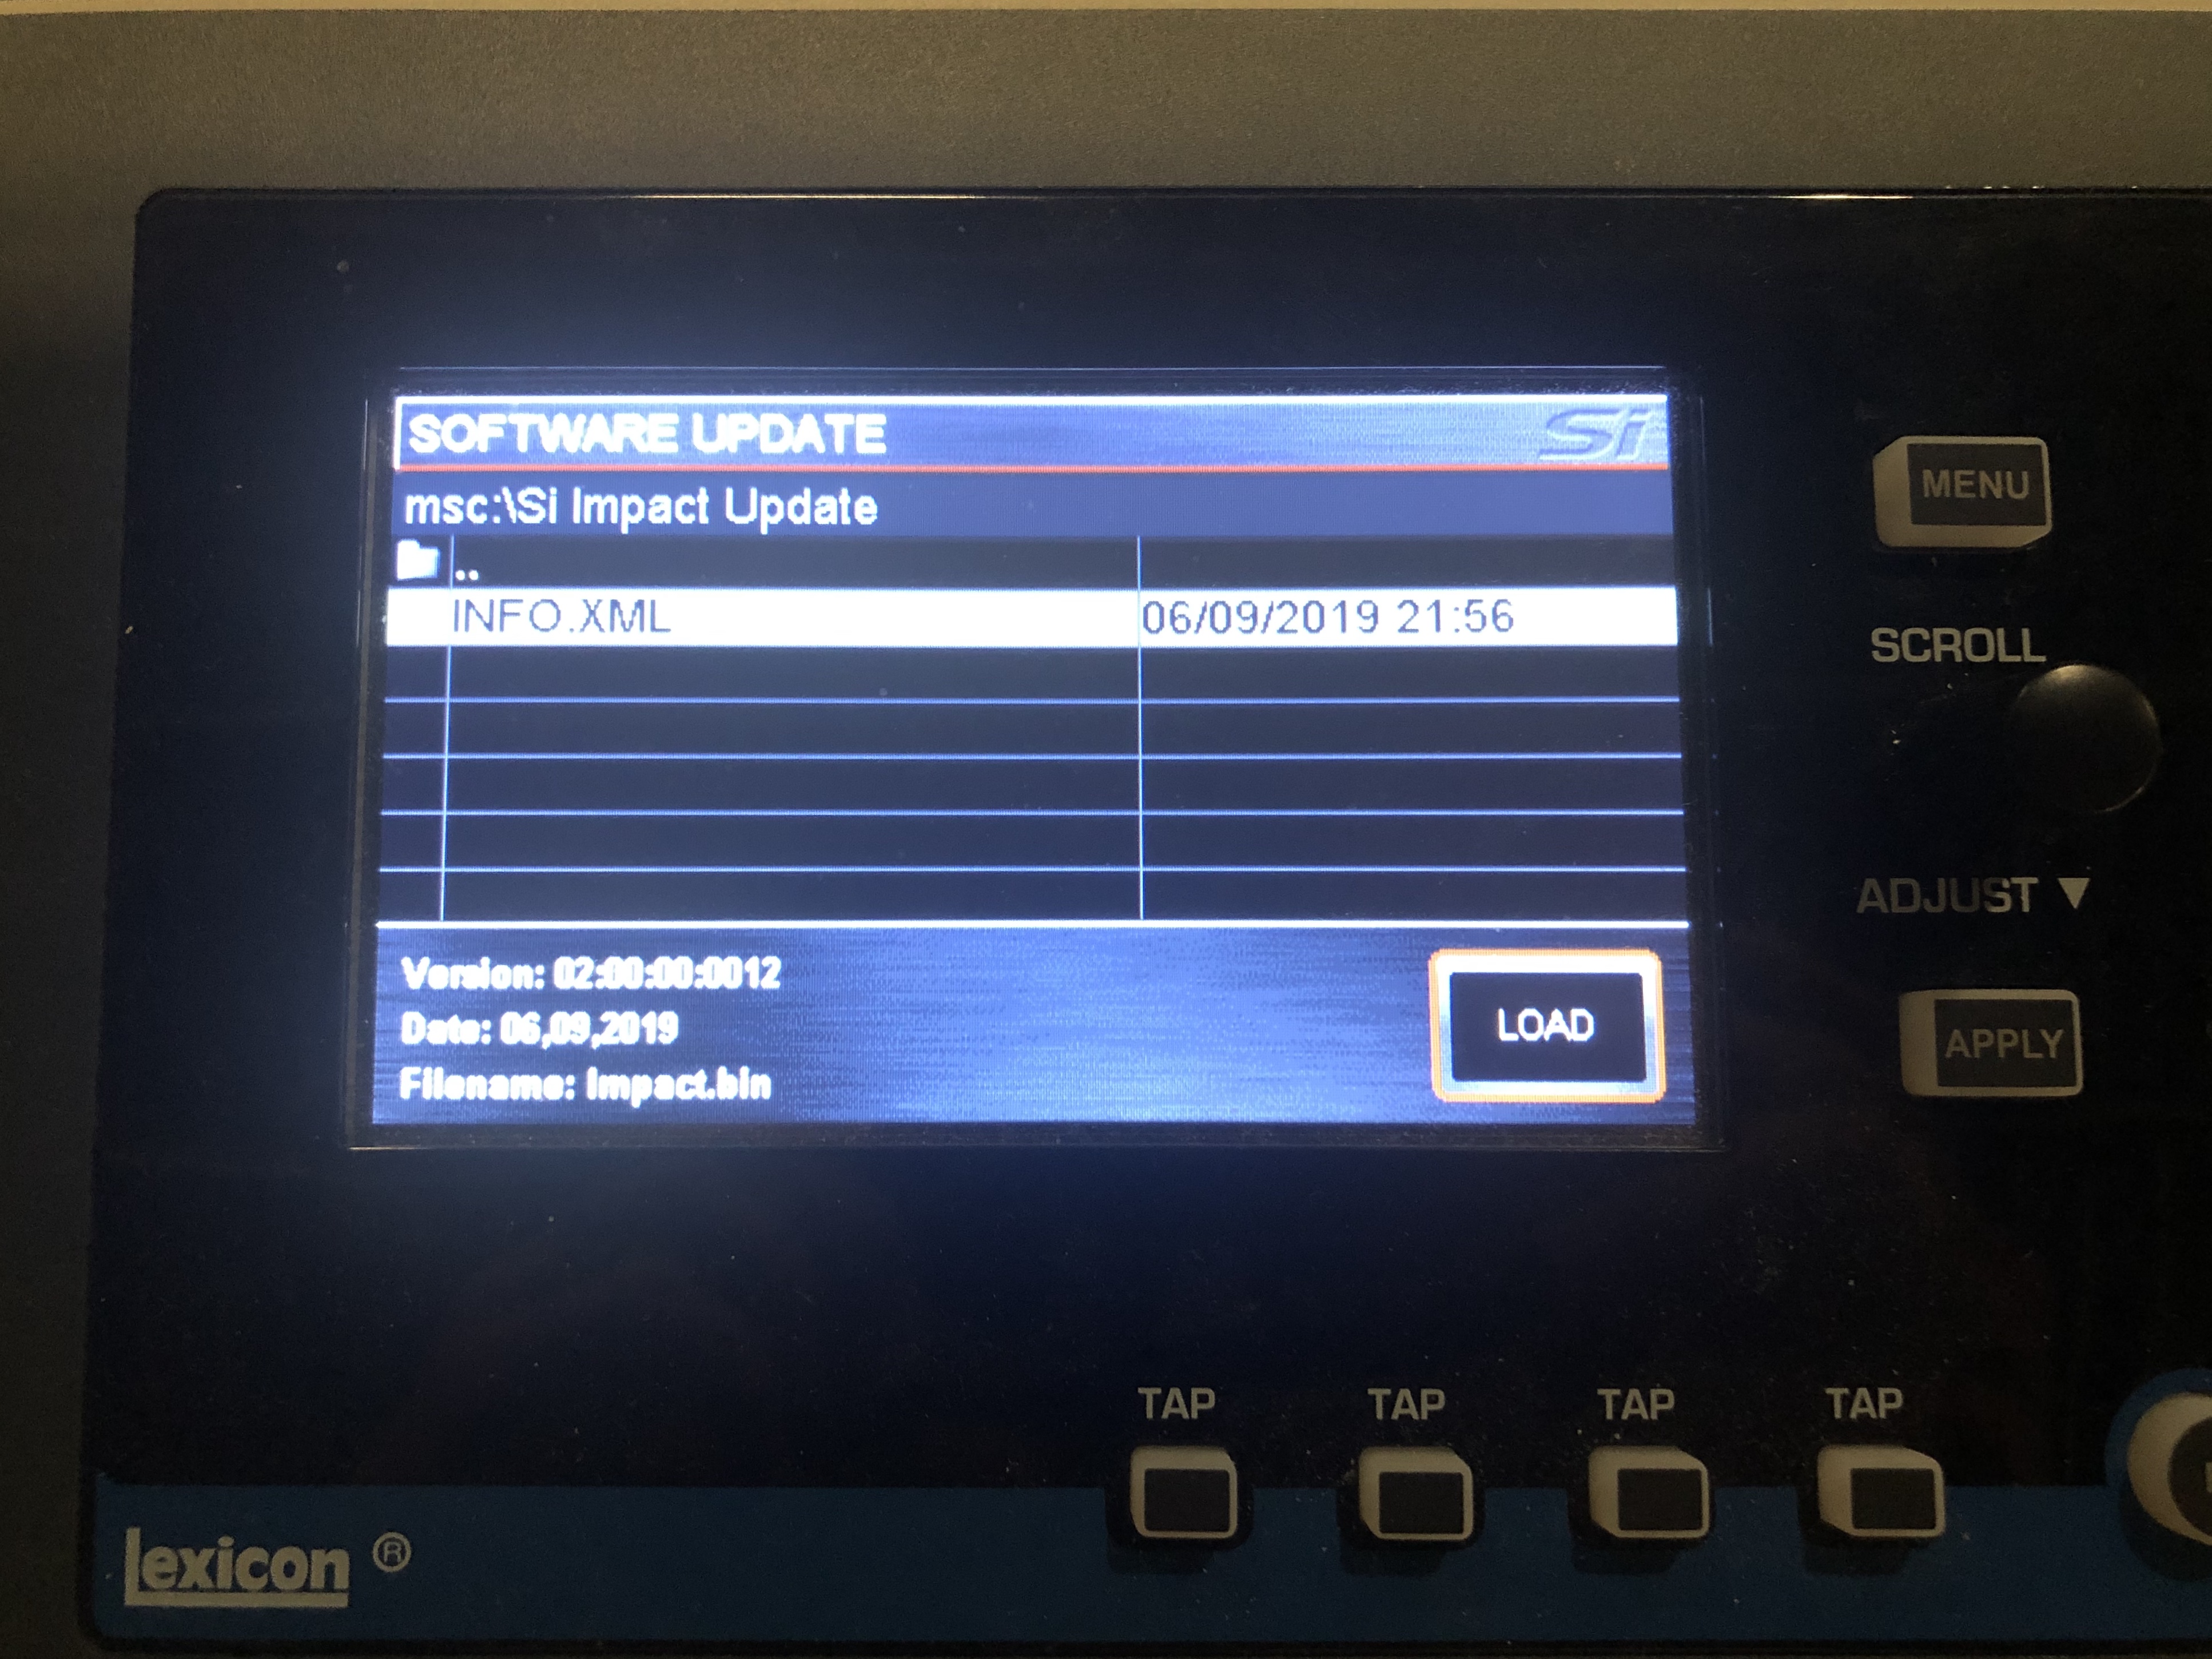
06. Select the INFO.XML file using the scroll/adjust encoder, the LOAD button at the bottom right
of the touch screen window will appear when a valid selection is made.

07. Press the LOAD button. Software will begin loading.
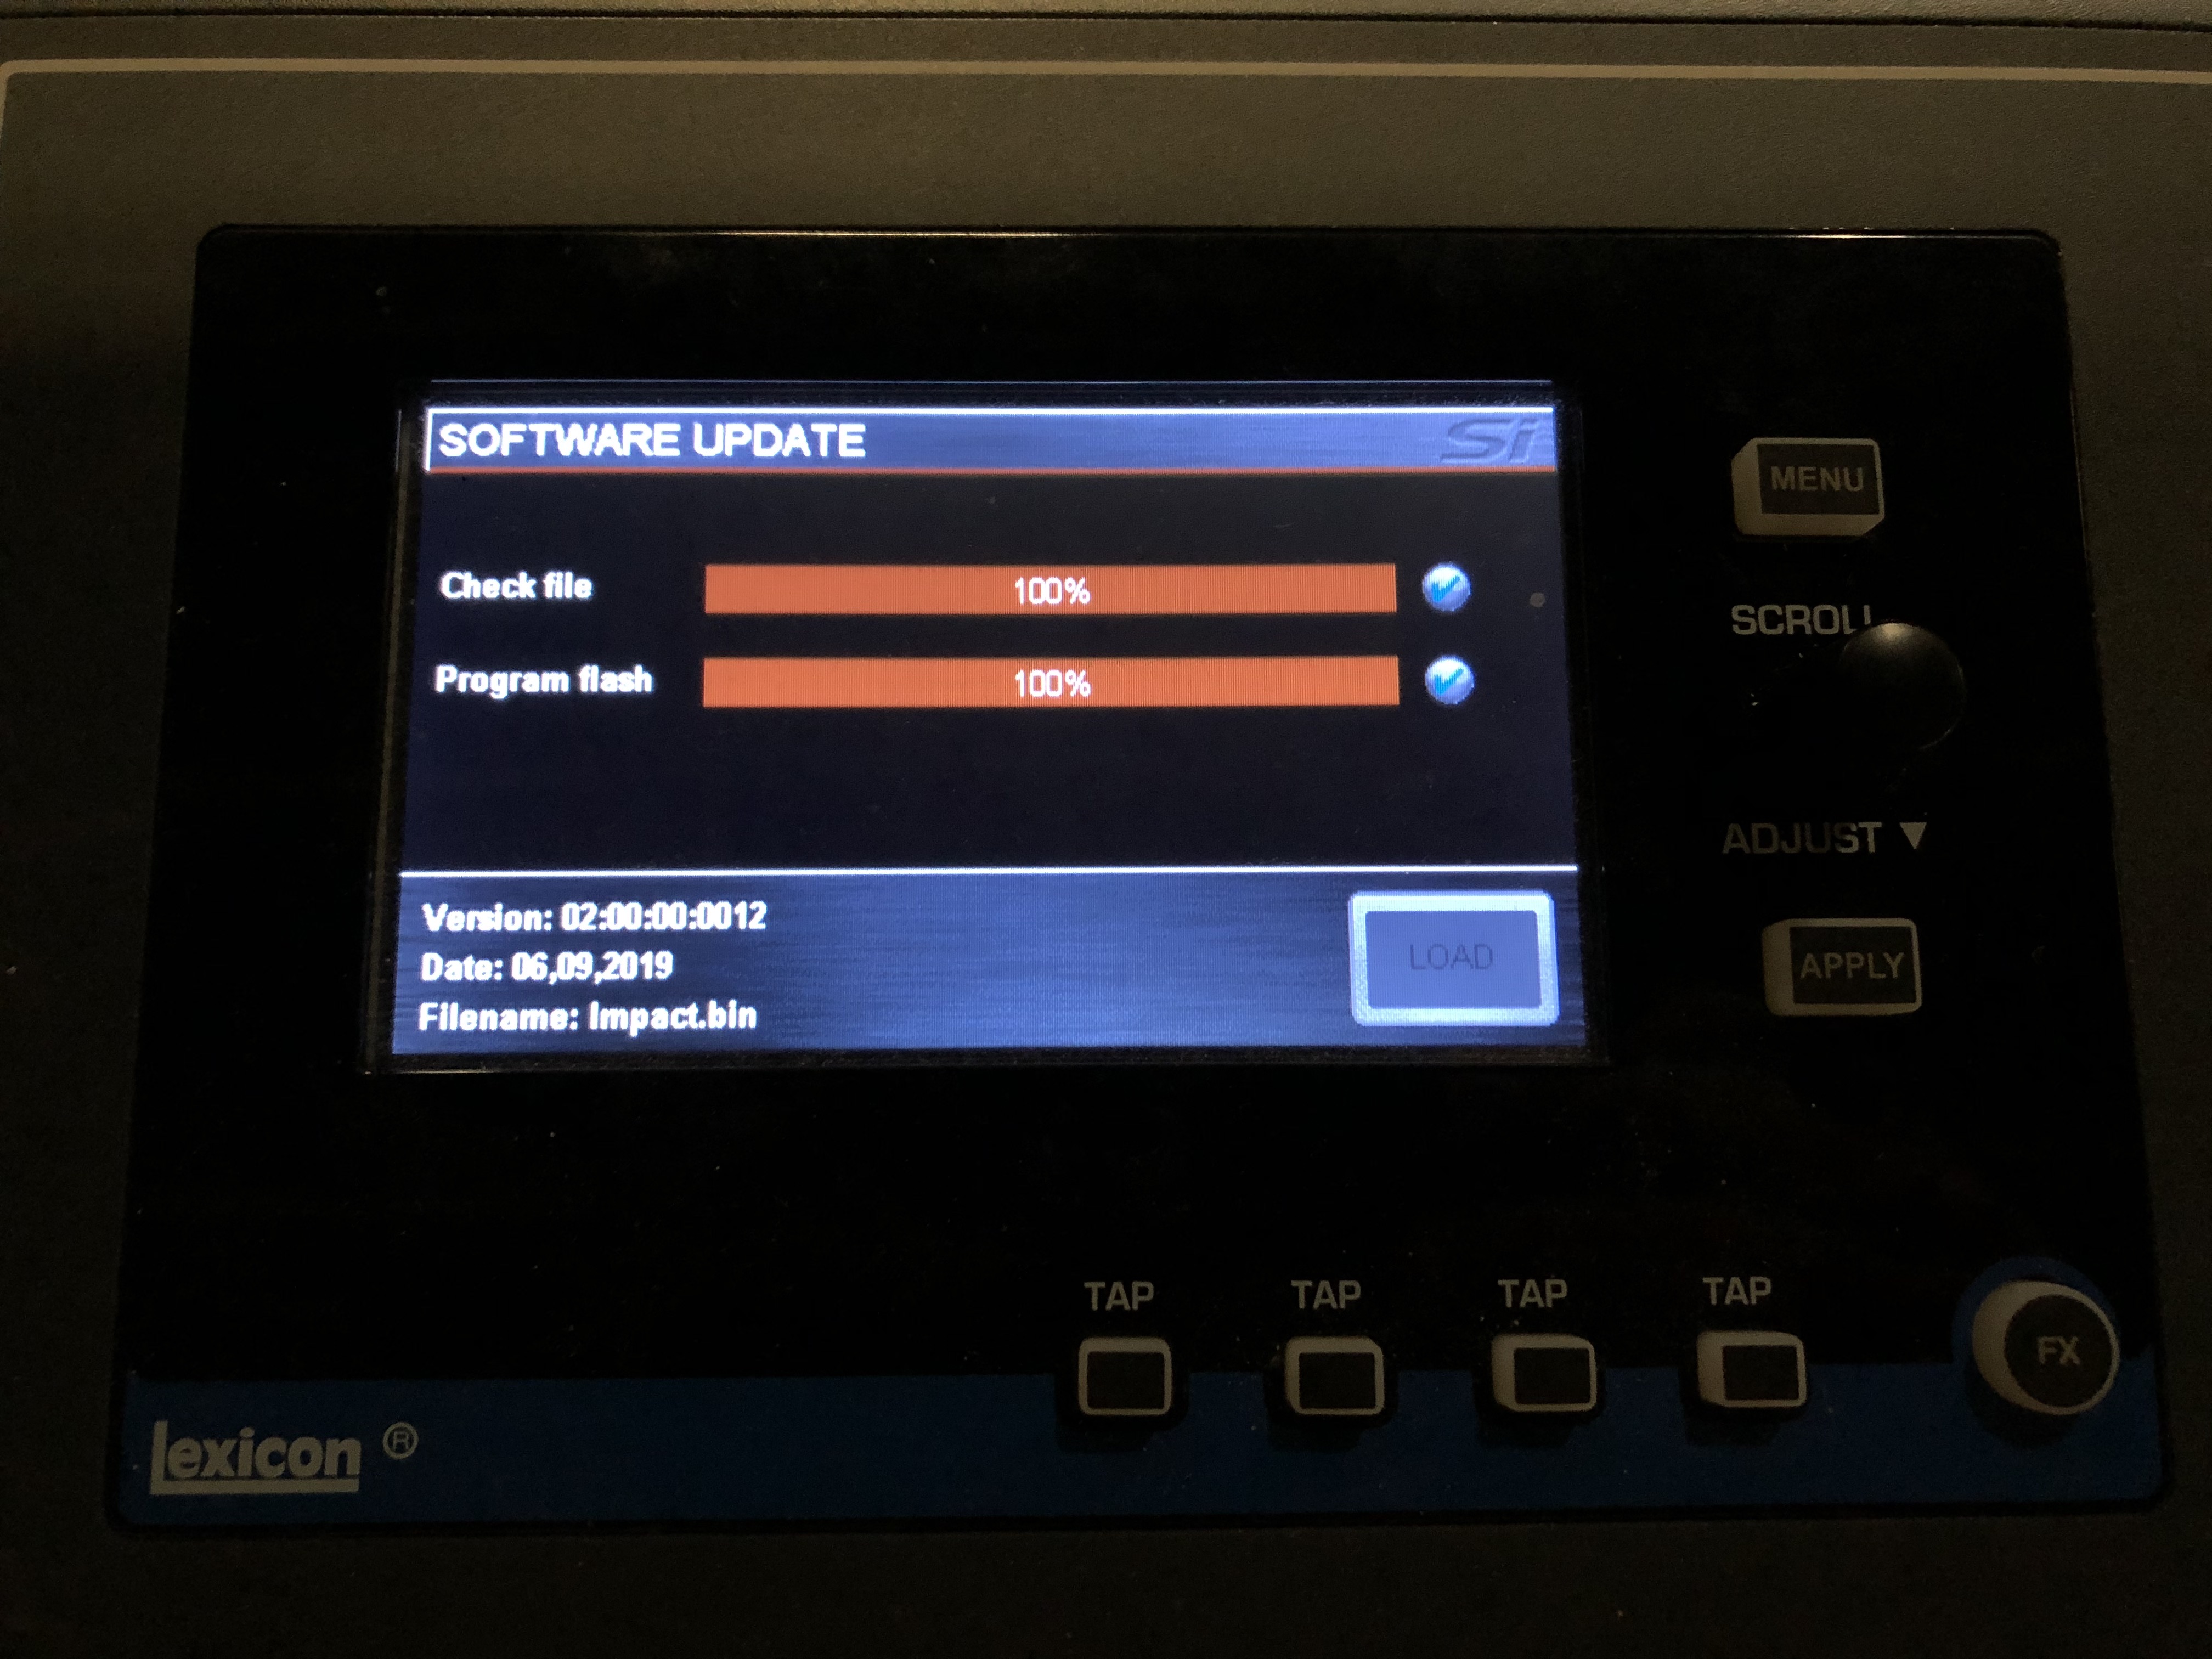
08. Wait until both progress bars have reached 100%, and the 'tick' symbol has appeared
to the right of each progress bar, before removing the USB stick.

NOTE:
Always follow on-screen instructions as the process may vary if the software
on your console is more than 1 release old.