Anytime Help Center

RUSH MH 1 Profile Plus- Replacing Gobos

Rating

​​​

RUSH ​MH 1 Profile Plus - Replacing gobos

Replacing Gobos


It is possible to replace the rotating gobos with custom gobos that match the quality and specifications of the gobos supplied with the fixture. See specifications below. 

Interchangeable Gobo Specifications

    • Gobos Gobo diameter- 26.8 mm +/- 0.2 mm (1.1 in. +/- 0.008 in.)
    • Max. Image diameter - 22.0 mm (0.87 in.)
    • Gobo thickness- 0.3 - 3.5 mm (0.01 - 0.14 in.)
    • Gobo material- Steel, aluminum or borosilicate glass

*Gobo replacement must be carried out by a qualified professional technician only.*


Optical components are fragile and are exposed to high temperatures. Wear cotton gloves while handling them and keep them perfectly clean to reduce the risk of heat damage. Do not contaminate them with grease or oil (from your fingers for example). Handle and store them with care. 

To replace a gobo: 

1.   Disconnect the fixture from power and allow it to cool for at least 10 minutes. 

2.   See below. Remove the fixture head covers using a Phillips screwdriver and find the side of the head that gives access to the gobo wheel.

Image 1.PNG


3.   The rotating gobos sit in gobo holders that slot into clips in the rotating gobo wheel. Find the gobo you want to replace. See below. Pull itgobo holder away from the gobo wheel slightly, then lift the gobo holder out of its clip in the wheel.  

Image 2.PNG


4.   The gobo is held in place on the blade by a retaining spring. Use a flat- bladed screwdriver to lever the end of the spring out of its slot, then lift the spring out of the gobo holder.  ​
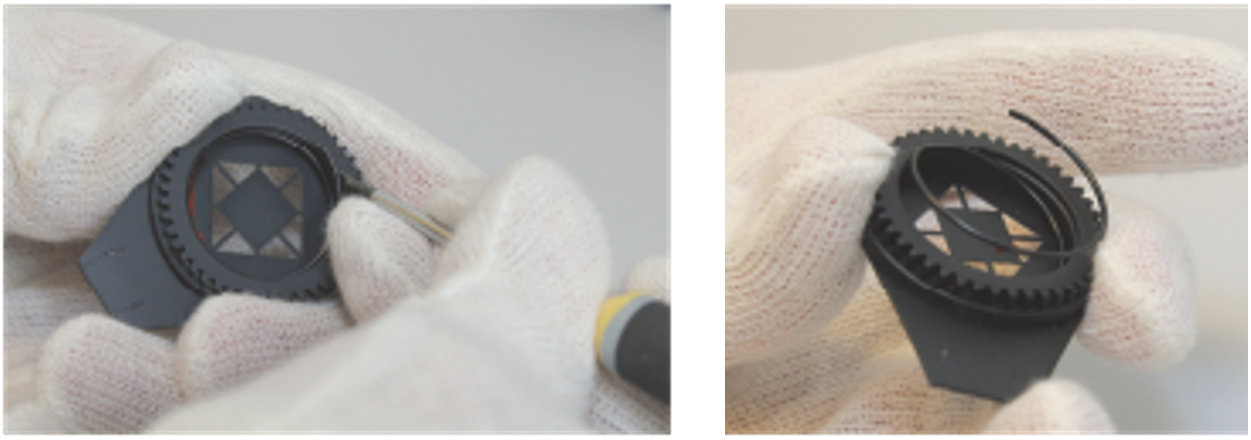
Image 3.PNG


5.   A small amount of locking fluid is applied at the factory to prevent gobos from rotating in gobo holders. Remove the gobo from the holder, freeing it from the locking fluid. 

6.   Insert the new gobo and apply a small amount of red Loctite or similar locking fluid to the edge of the gobo and the gobo holder.

7.   Reassemble following the steps above in reverse order. Pay particular attention to the following points during reassembly: 

•     Make sure that the gobo retaining spring is held firmly in its slot in the gobo holder. 

•     Slide the tab on the gobo holder under the clip on the gobo wheel (see below) and make sure that the teeth on the gobo holder engage correctly in the cog in the center of the gobo wheel.  
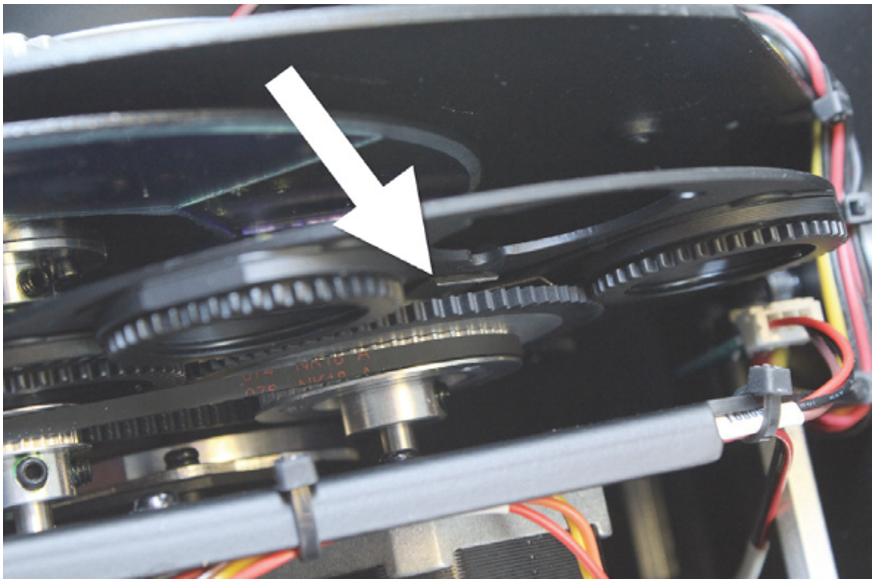
Image 4.PNG


8.   Reinstall the head cover and be ready for the head to move during a reset before reapplying power.  


Downloads

Product


Topic

Configuring

Related Articles

Last modified at 9/21/2020 9:12 AM by PRO Knowledge Base
Top