


HiQnet Motion Control™ is an Apple iOS app which enables customized control interfaces to be exported to iPad, iPhone and iPod Touch devices for mobile system control. Dedicated design templates are available for the configuration of customized interfaces, which can be used to control devices from BSS Audio, Crown, dbx and JBL.
Once the app is purchased under an account, that account can install the app on as many iOS devices that they own. Once the app in installed on a device, any number of control panels designed within the Custom Panel Designer in HiQnet Audio Architect can be loaded onto an iOS device directly from the Audio Architect interface.
Navigation between the panels can be done two ways - either by the use of a two finger swiping gesture or by double tapping the screen to bring up an automatically-generated thumbnail navigation bar at the bottom of the iOS display.
HiQnet Motion Control is available from the
Apple
App Store.
If you have not already setup your network, or connected your iOS device
to your network see HiQnet
Motion Control - Before You Begin.
TO ADD HIQNET MOTION CONTROL
Click the arrow at the bottom of the New button in the Panels control
group within Offline Design Ribbon, and select one of the iOS devices
in the drop-down menu. This will bring up the following options:

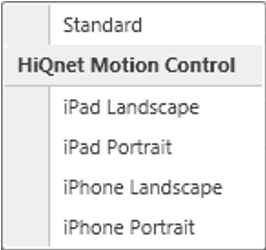
- Select which option (iPad Landscape, iPad Portrait, iPhone Landscape,
or iPhone Portrait) suits your need. Panel design specifications differ based on the panel type selected.
- Name the Panel.
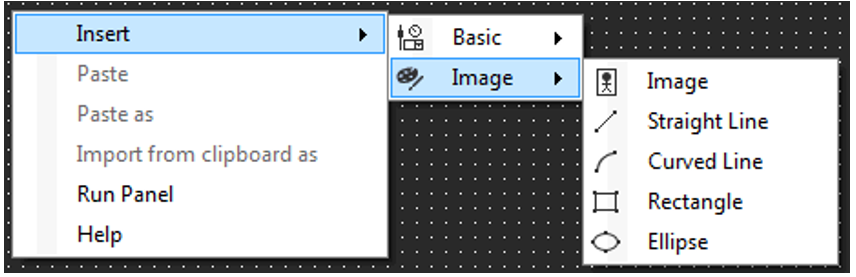
From here you have two options to insert a control onto the custom panel:
1. Insert Controls
Right click in the dotted area to insert a selected control onto the
custom panel surface. You have the option of selecting a default Control
then either:
- Basic: Button - Text
Label, Text Box, Fader - Vertical, Button - On/Off etc.
- Image:
Here you may insert an image or draw a graphical control to which
you may assign a parameter.


NOTE: The  symbol on a control
indicates that a parameter has yet to be assigned.
symbol on a control
indicates that a parameter has yet to be assigned.
Once you have created the panel, go to the Venue Explorer on the left,
open the available device parameters and drag the appropriate parameter
onto the control. For example; select a mute function and assign it to
an on/off button, or select a level control and assign it to a fader. Once the control
is assigned, the symbol goes away
and demarcating lines are added.
2. Drag the actual parameter from the device
onto the custom panel.
For example, using a Crown DCi 2 Channel Series: In the Venue
Explorer window, expand the DCi 2 Channel Series tree which will display
the available parameters. Open the Ch1 Analog Input parameters using the
drop-down menu arrow, then left click/hold the Fader parameter, and drag
it onto the custom panel surface to add that control. Select Fader - Vertical.

Notice in the Parameters Tab of the Properties
window, you'll see that the DCi
2 Channel Series: Ch1 Analog Input: Fader is assigned to the panel
control.
The process is repeated to add additional parameter controls.
Add additional iOS panels
Multiple Motion Control panels may be created. In the Panels section of
the Offline Design Ribbon, select the arrow below the New button for each additional panel
you wish to create.
Assigning devices to control panels
If you are correctly connected to the network with your iOS device, and it is running Motion Control, it will show
up in the Venue View of Audio Architect as a Discovered Device.
Offline selection
If you are not online with your iOS device, you may create an Offline
Device. Select the Devices window, then drag and drop your iOS device
onto the Venue.
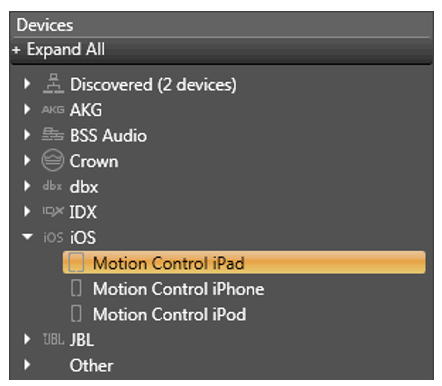
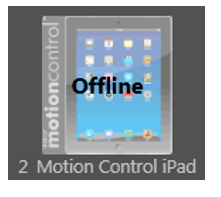
For an example, click and drag the Motion Control iPad onto your
Venue. You'll see:

Double click this icon to bring up a dialog box with the following functions:
Assign each Motion Control Page to a selected Panel by clicking in the
"Select to add..." drop-down menu and choosing which Panel you
want assigned to the Page.

Once all the panels have been assigned, if you are connected to your
iOS device (ie: the iPad or iPhone) and Audio Architect is in Run Venue
mode, clicking the "OK" button sends your custom panels
via your wireless connection to that device.
NOTE: Make sure all the panels you are sending to the iPad are open in edit mode in the background. The thumbnail images are created from these panels, if they are not open in edit mode the thumbnails will appear blank on the iPad after loading.
The Show iPhone Panels box is
unchecked by default. Check this box to show any iPhone panels you may
have created. If you have added iPhone or iPod devices, this box will
not appear.
The Lock App Settings button,
when checked, removes the settings button from within the Motion Control
App.
Closing Motion Control
Due to the nature of iOS, if you close Motion Control or your iOS device,
the iOS device will show as “Offline” in the Audio Architect Venue and
no longer appear in the “Devices” window (although this may take a moment).
Testing Motion Control Panels in Audio Architect
You can operate a Motion Control panel in Audio Architect in several ways:
- From the Offline Design Tab, you can Right Click on the panel in the Panel section of the ribbon and selecting Activate.
- From the Custom Panel Designer Tab, make sure the panel you wish to test is the current panel selected for editing, Select Launch Current in the Panel section of the ribbon.
You can close an active Motion Control panel in Audio Architect two ways:
- Left Click on the panel to make sure it is the active panel in Windows and press ALT + F4 to close selected window.
- In the task bar of windows, the panel will show as a separate process from Audio Architect. Mouse over the Panel in the Task Bar and X out to close the panel.
