Windows 11 Ethernet Static Settings
To set a static IP address configuration to an Ethernet adapter, use these steps:
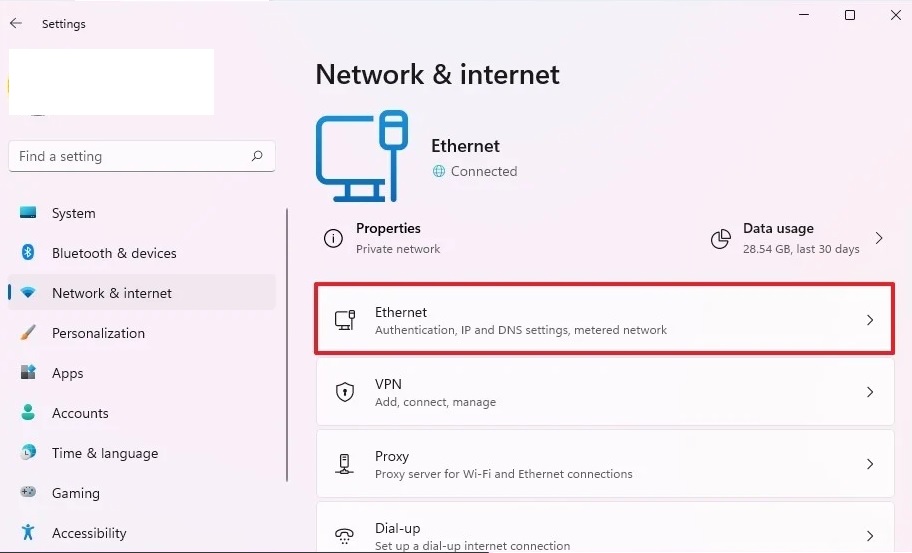
1. Open Settings.
2. Click on Network & internet.
3. Click the Ethernet page on the right side.
4. Click the Edit button for IP Assignment:

5. Select the Manual option.
6. Turn on the IPv4 toggle switch.
7. In the IP address setting, specify the IP address to assign to the computer.

Quick tip: The IP address should be within the network range, and it should be outside of the DHCP scope to avoid possible conflicts. For instance, if the network is in the 192.168.1.x range and the DHCP assigns an address from 192.168.1.2 through 192.168.1.199 (one of the most common default router settings), a suitable static address could be 192.168.1.200.
8. In the Subnet mask setting, specify the network mask — for example, 255.255.255.0.
Quick note: If you are configuring the settings on a home or office network, the subnet mask is typically 255.255.255.0. However, it might be different if you are in a business environment.
9. In the Gateway setting, specify the gateway address (usually the router address) — for example, 192.168.1.1.
10. In the Preferred DNS setting, specify the network DNS address (I use Google Public DNS even though the mixer will never require DNS) – for example, 8.8.8.8.
10. In the Preferred DNS encryption setting, select the Unencrypted only option.
11. In the Alternate DNS setting, specify a secondary DNS address that will be used in case the system can't find the correct route with the primary address. This must be unique. A good choice could be 8.8.4.4 , which is Google's Public DNS Alternate.
12. In the Alternate DNS encryption setting, select the Unencrypted only option.
13. Click the Save button.
After you complete the steps, the computer will start using the new static network configuration.
