Gain Timed
This processing object provides a mechanism to make gain level changes smoothly. See HiQnet Audio Architect Help for a detailed description.
An installation may require changes to the program volume level at specific times of the day. Parameter Presets could be used to make changes to gain levels. The transition from one gain level to another would be instantaneous in this case. The transition would be smoother and less jarring if the Gain Timed object were used instead.


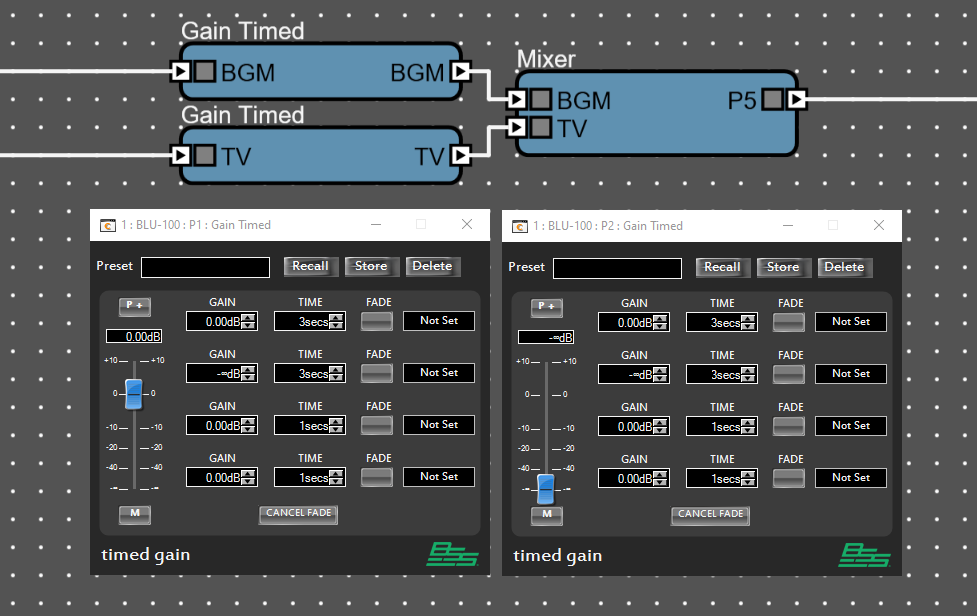
An installation may also require switching between different program sources. A Source Selector or Matrix could be used for this purpose. The changes between program sources would be instantaneous. The changes would be more gradual and discreet if Gain Timed objects were used to cross-fade between program sources. Once source would fade down as another source fades up.
The Default Control Panel provides the functions required to operate the Gain Timed object. These controls are not practical for use with wall controllers or custom control panels. The following examples will demonstrate methods to automate the controls and simplify operation.
Links
The FADE controls can be linked to provide buttons that will trigger the fades.
Navigate to the Audio Configuration of the BSS Soundweb London device in the Venue.
Click “New Link" in the Soundweb London tab in the ribbon.
Select “Radio" in the dropdown menu.
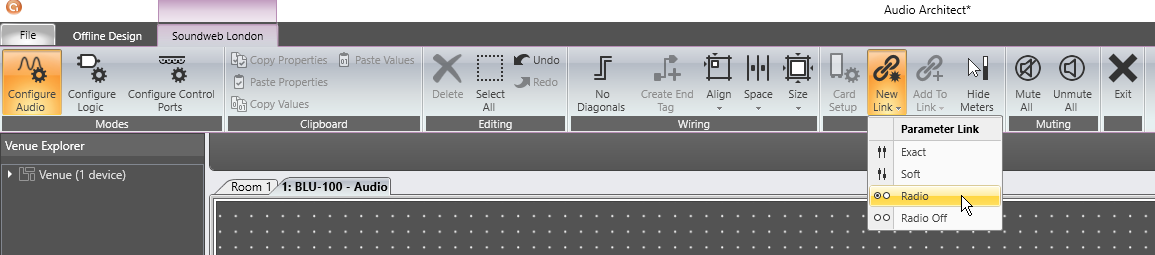
The Radio Link will appear in the “Soundweb London Links" folder in the Venue Explorer.
Click and drag the Link onto each FADE button.
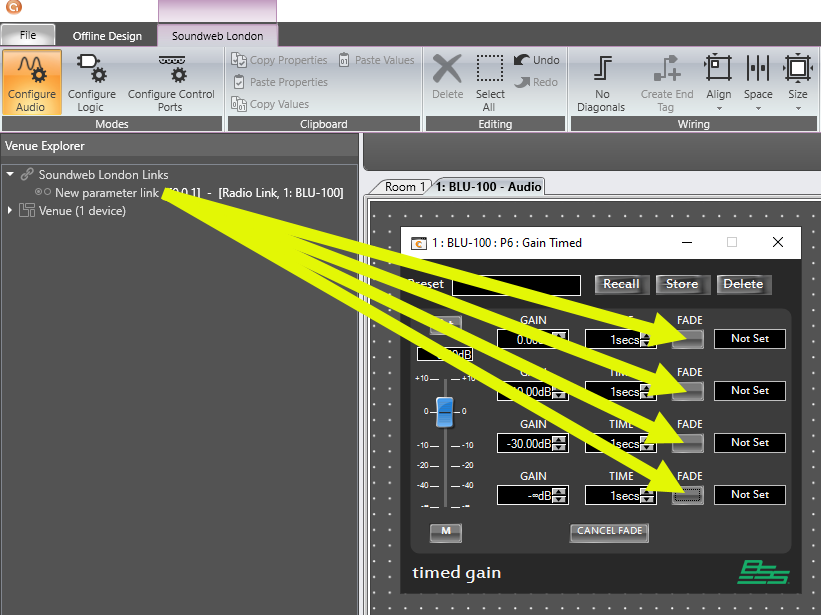
The FADE controls will operate as inter-cancelling buttons that will stay ON when pressed. The buttons can be added to custom panels or assigned to wall controllers and Control Inputs. They can also be operated with third party control devices.
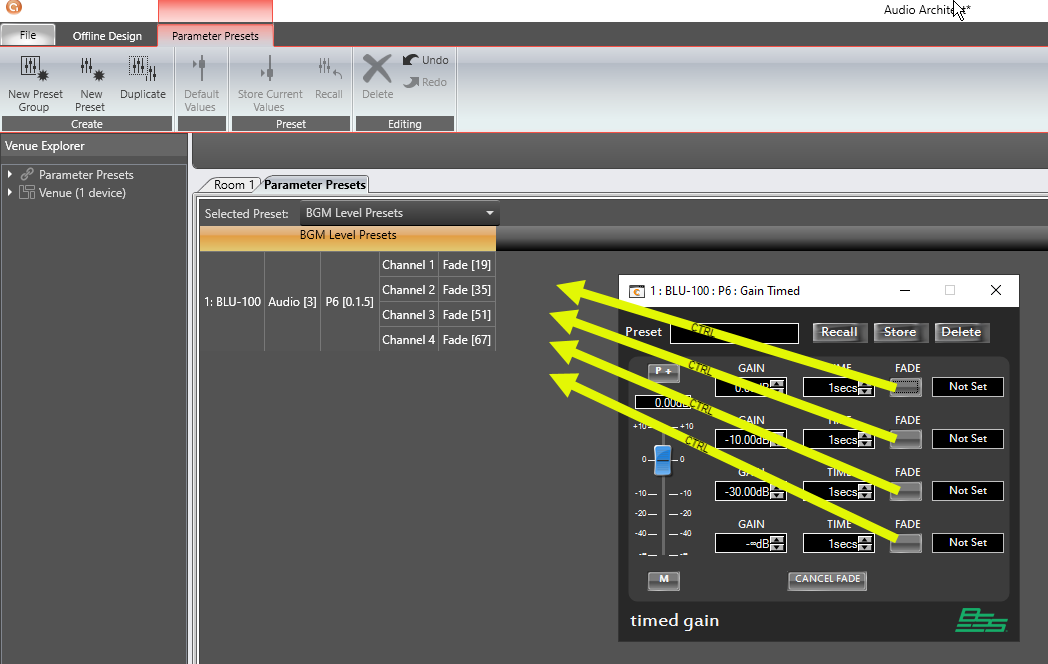
Parameter Presets
The FADE controls can be added to a Parameter Preset Group.
Click and drag the FADE controls into the Parameter Presets window while holding down the CTRL key.
Click “New Preset" in the Parameter Presets tab in the ribbon. Ensure that only one FADE is ON in each Parameter Preset.
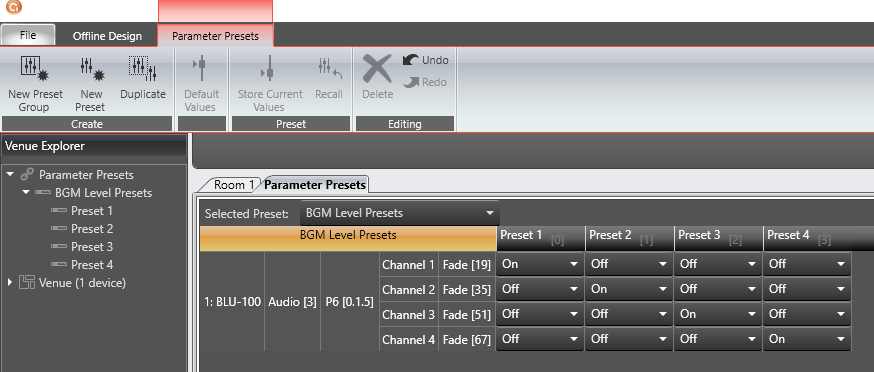
The Parameter Presets can be added to custom panels or assigned to wall controllers and Control Inputs. They can also be operated with third party control devices.
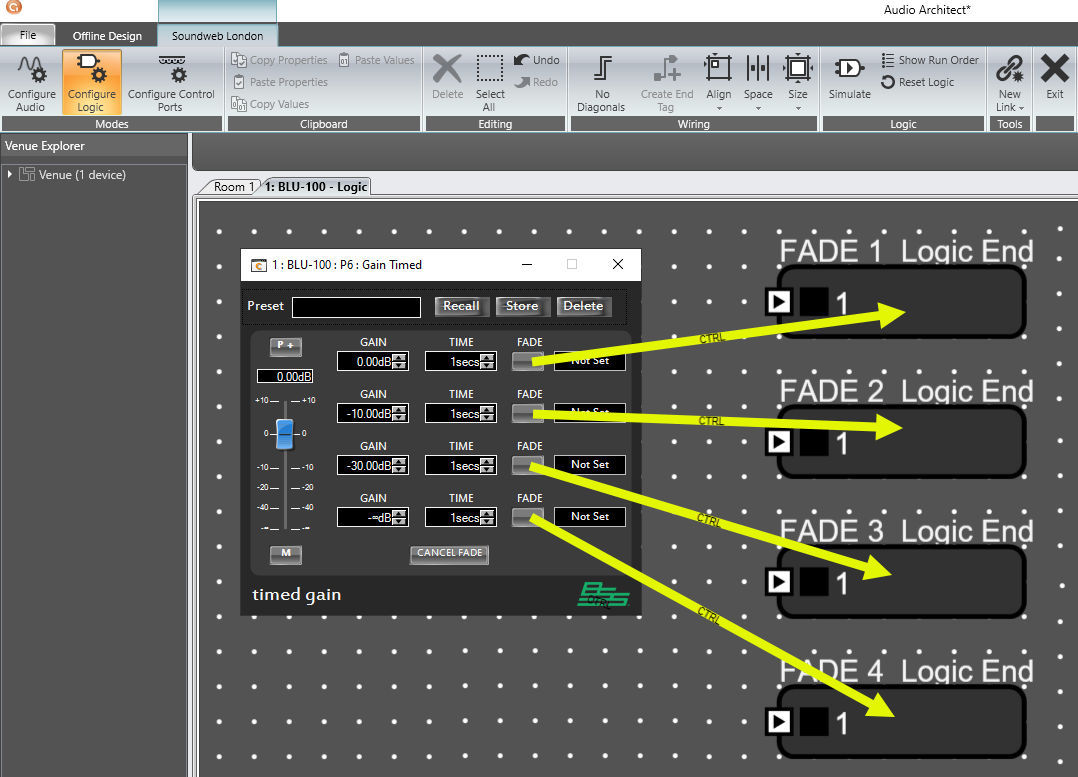
Logic Configuration
This method offers the most flexibility. FADE controls can be operated in a number of ways when they are under the control of Logic End objects.
Add Logic End objects to the configuration.
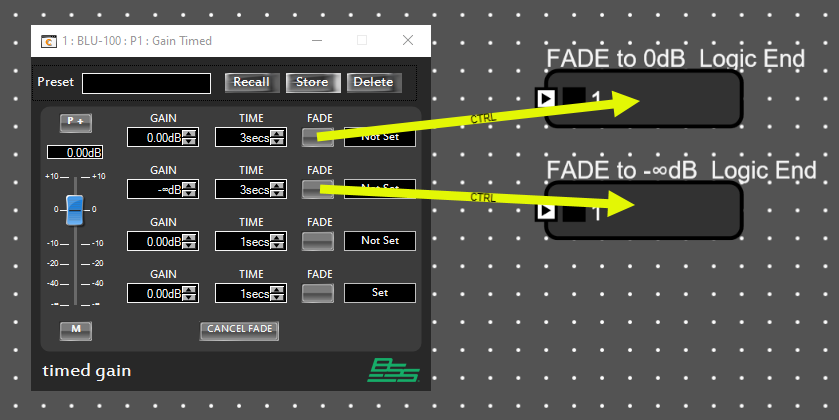
Assign the FADE controls to the Logic End objects by clicking and dragging while holding the CTRL key.
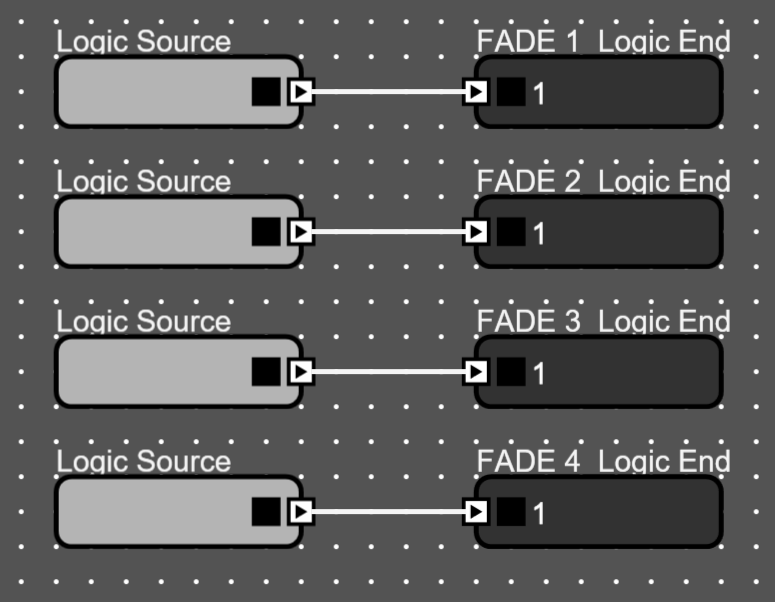
The Logic End objects can be wired to Source objects or integrated with existing Logic objects to obtain the functionality required.
Logic Source objects provide direct control over the FADE function.
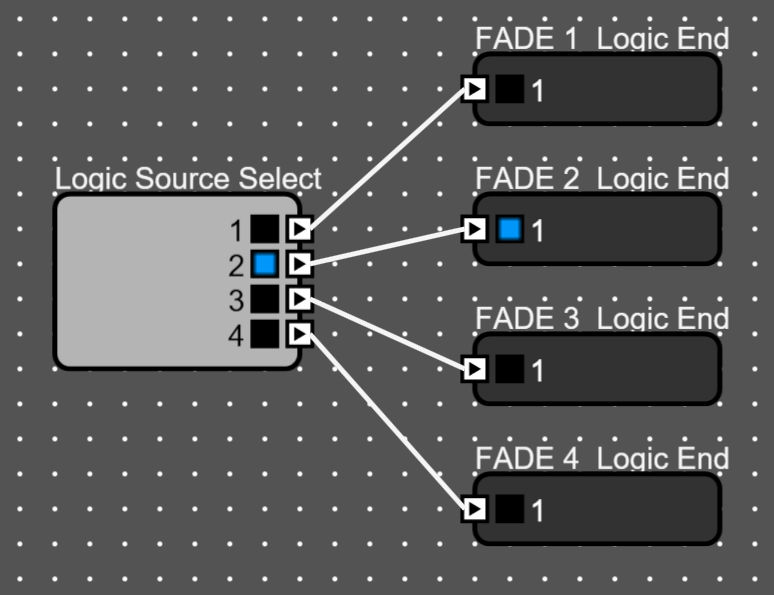
Logic Source Select object provides selectable control.
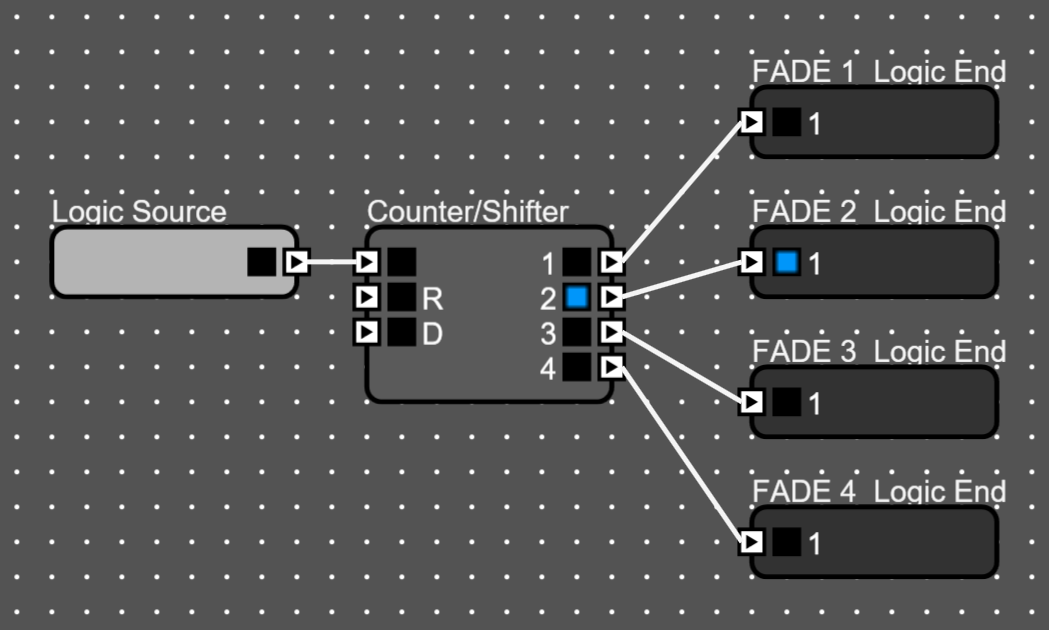
Logic Source and Counter/Shifter objects provide sequential control.
Assigning FADE controls with 0db and -∞dB Gain settings provide a Mute/Unmute functionality.
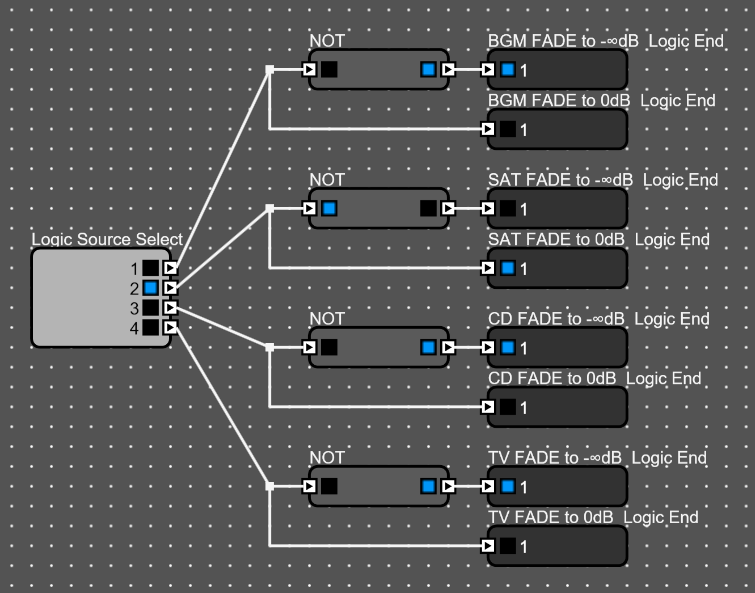
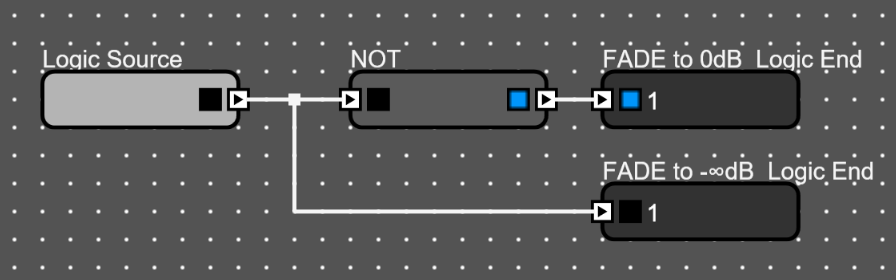
Logic Source and NOT objects provide toggle functionality. Gain Timed will fade down to –inf dB when Logic Source is ON. It will fade up to 0dB when Logic Source is OFF.
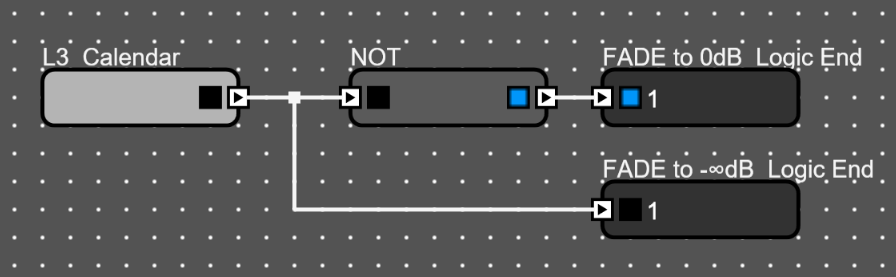
Logic Calendar and NOT objects provide scheduled functionality.
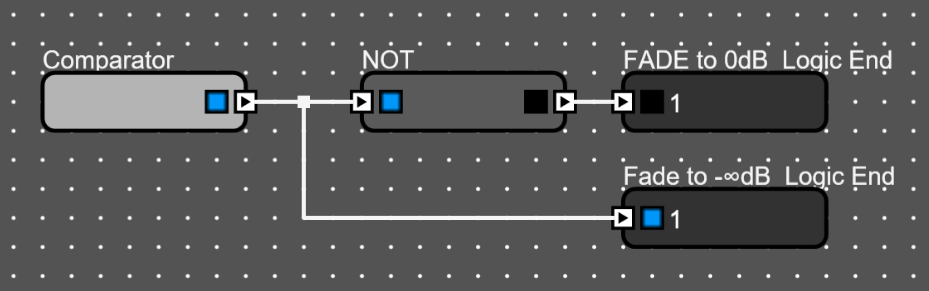
Logic Comparator provides functionality based on Meter level.
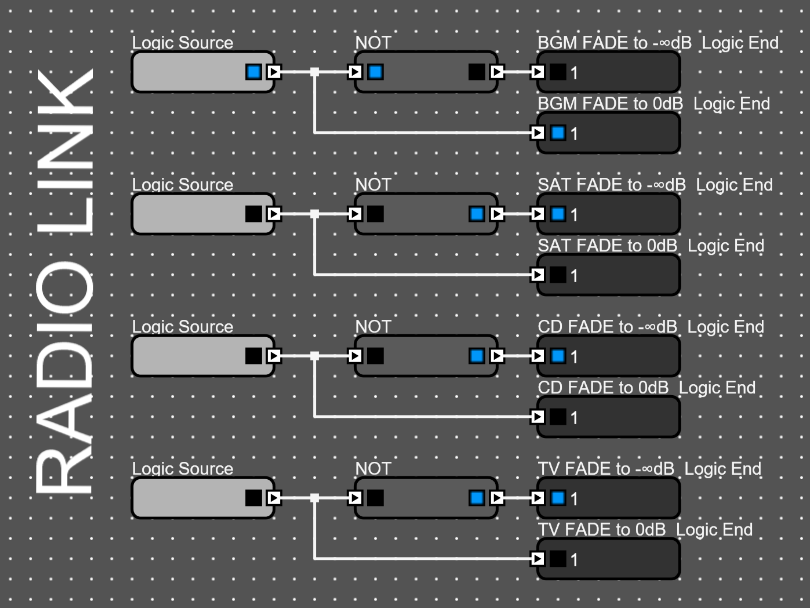
Gain Timed objects can be used to cross-fade between program sources.

Logic Source objects which are linked with a Radio Link provide a button-selectable between program sources. The Logic Sources will operate as inter-cancelling buttons that will stay ON when pressed. The buttons can be added to custom panels or assigned to wall controllers and Control Inputs. They can also be operated with third party control devices.
Logic Source Select object provides selectable control. The Logic Source Select can be added to custom panels or assigned to wall controllers and Control Inputs. They can also be operated with third party control devices.